EDiM 5-6-7: Hot, Bristles, Envelope, ink and watercolor, 8×10
May 5 was “Draw Something Hot.” I went for the obvious, a cup of hot tea because I like this cup and I was short on imagination and time due to some “first world problems” (iPhone went bad and required way too many wasted hours to restore it).
May 6 was “Something with Bristles.” I wanted to draw the odd, bristly whiskers under my dog’s chin but she wouldn’t hold still long enough. Instead here’s a bristly bottle brush with a bonus soft cotton tip. I bought it to clean something I apparently no longer own since I haven’t used it in years and can’t remember what it was for. I created the bristles by painting in watercolor and then adding white gel pen.
May 7 was “Envelope” and this is the Mothers Day card and envelope I sent to my mom after I sketched it.
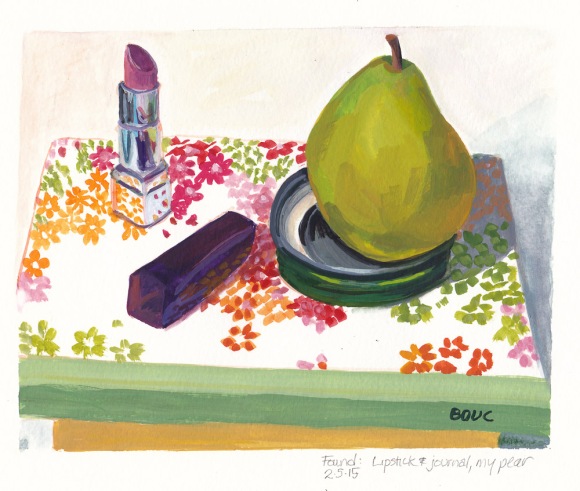
Practicing gouache with found items. The lipstick with purple case I found on the street, the journal at the recycling center’s little “shop” where you leave things you don’t want and take things for free. The pear and jar lid I found in my kitchen so I guess they aren’t officially found items. The cigar box the journal is sitting on was a freebie from the local smoke shop. I love cigar boxes so much! This gouache sketch made me happy…feels like I’m starting to get it.
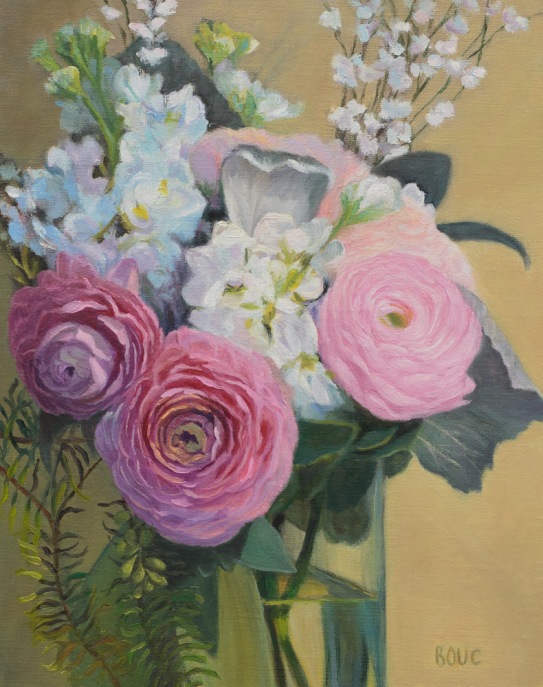
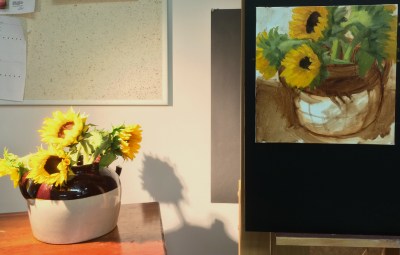
I started this painting of my daughter-in-law’s wedding flowers soon after the wedding in January 2014 but wasn’t thrilled with the way it turned out so set it aside. I began reworking it again recently, and after several times reaching a point of saying, “Finished” and then working on it some more, I remembered the saying, “Art is never finished, only abandoned” and decided it was simply time to stop.
But there’s still one thing that bugs me in this painting: the pink rose on the right just feels too Barbie pink to me. Every time I look at the painting it irks me. But I’ve repainted it 5 times and perhaps because the photo I’m working from isn’t very good, especially of that rose, it keeps turning out the same. I may try one more time. What do you think? Leave it or try again? Or maybe find another photo of the set up with a different view of that rose and try again from that photo?
My challenge in painting is always how to maintain the freshness of my original inspiration, color choices and brush strokes while holding back my inner perfectionist who wants to keep noodling around forever. Another challenge with returning to an older painting is that the fresh flowers are long gone and only a so-so photo remains to work from. Likewise all my new fresh ideas about painting have to be set aside to work on something from the point of view of a year ago.
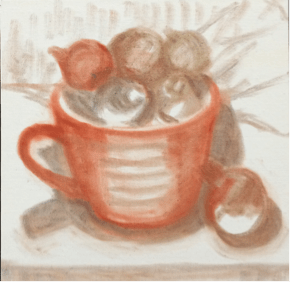
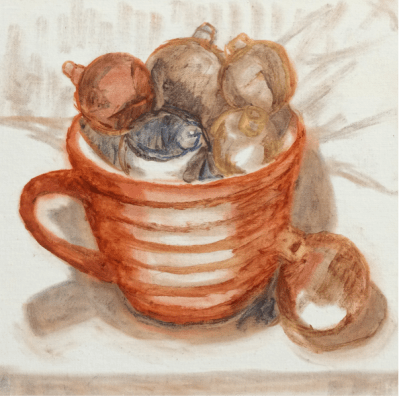
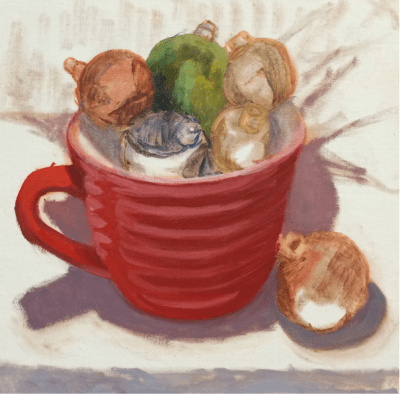
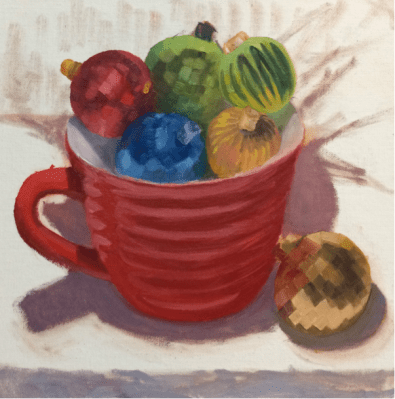
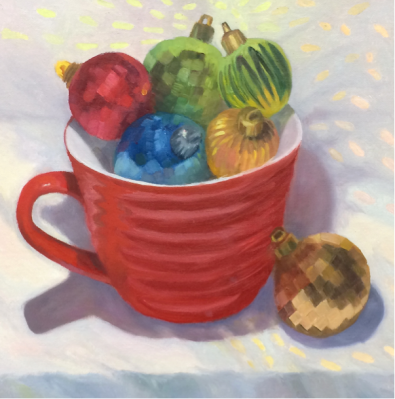
Christmas Balls in Red Cup, oil on panel, 8×8 inches
Happy Holidays! As Leonardo da Vinci said, “Art is never finished, only abandoned.” That’s especially true of this painting because the reflections, ridges and facets kept changing appearance as I moved or the light changed, and I could have worked on it forever. I’d planned to post it before Christmas but just couldn’t “finish” in time.
This is another painting (available here) in my “Found and Free” series: both the cup and ornaments were found on walks in “free” boxes set out on the curb.
You’ll see in the steps below that I was experimenting with using Panpastels and Sofft Tools to do the initial drawing on my panel. They are amazing: the pastels go on smoothly like paint but are completely erasable with any eraser and disappear into the oil paint so there’s no fixative required.
Montessori Pink Tower and Turnips, oil on linen panel, 10×10 inches
This painting was inspired by my neighbor’s childhood Montessori Pink Tower blocks arranged like a little cityscape on his coffee table. I found the blocks irresistible and had to paint them. The turnips I’d bought to cook for dinner seemed like a perfect addition (I know, I’m weird, right?) The painting is available on my Daily Paintworks gallery here.
If you’d like to see my full notes with goals and outcomes for each painting session, you can open this small PDF file. Life intervened between sessions which made painting from life difficult as you can see in the photos below taken at the beginning and end of the painting process: the turnips had started to sprout and wrinkle.
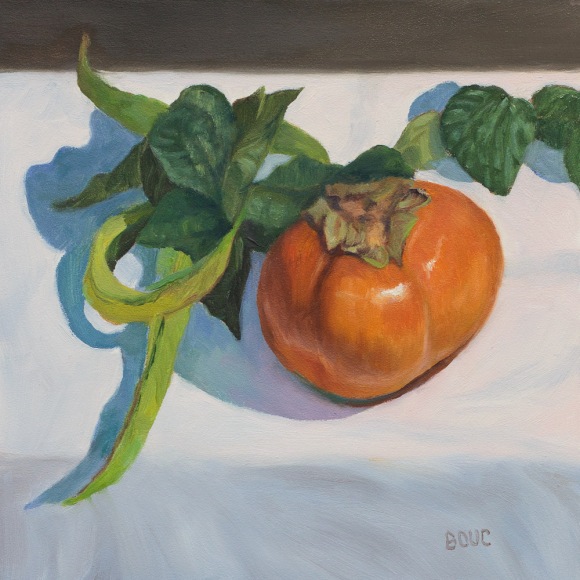
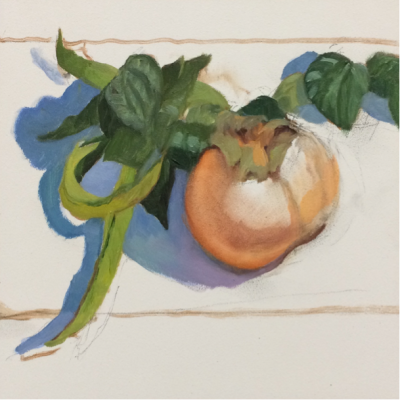
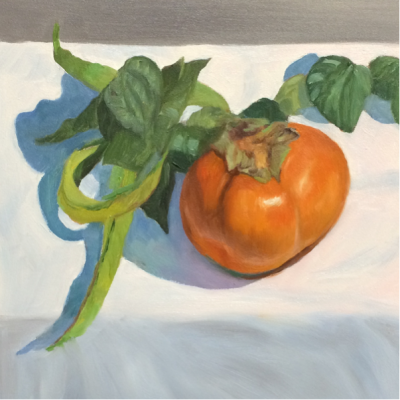
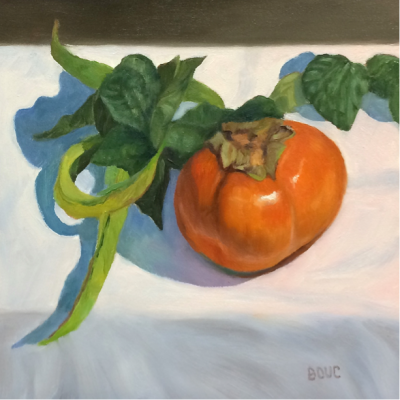
Persimmon and String Beans, oil on panel, 6×6 inches
This was one of the those magical paintings that just worked from beginning to end. Maybe it was painting on Gessobord, which I love, or maybe it was because I tried to stay really focused. It’s available here on Daily Paintworks.
I was careful to paint the string beans from the garden and their leaves first since I knew they would change quickly. I stopped when I found myself getting tired or losing focus and took a break. And I closely followed my pre-planned goals for each session.
See my session chart for Persimmon and String Beans (pdf) with all the steps, plans and session images or see the images of the steps below without details. One new step I added this time was studying the nearly finished painting in Photoshop on a large screen before declaring it finished and then finding and noting areas that needed adjustments, including completely changing the background value at top.
Let me know if you’re finding these charts or step by steps interesting. I do them for myself but if others find it interesting it’s worth posting them.
Photo of set up (but painted from life)
Session 1A: the drawing on panel in charcoal then restated with thinned paint
Session 1B, painting the green beans since the leaves would change quickly. I started to paint the persimmon but wiped it off when I realized I’d lost focus and needed a break before returning and painting with focus
Session 2, painting everything except green beans
Adjustments/corrections made in Photoshop including darkening the top background
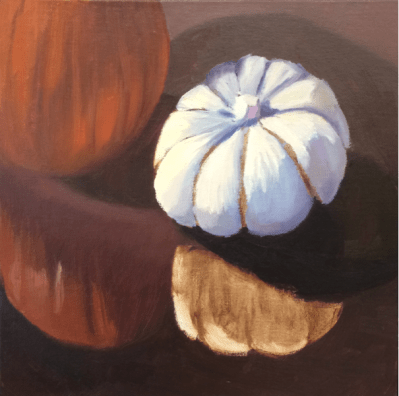
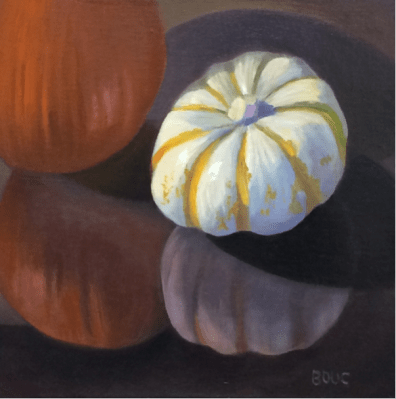
Pumpkin and Gourd on Glass, oil on linen panel, 10×10 inches
What an interesting painting challenge this was: strong warm light on a white gourd and a small pumpkin, with reflections and shadows on a shiny black plexiglass surface. Below are the steps as I worked on this painting (available for purchase on my DailyPaintworks gallery).
As usual there was one session where I did some “unauthorized painting” (see previous post for explanation) so the next session was all about trying to restore those areas. I’m trying to learn when to preserve the freshness of the “alla prima” first attempt and when to rework it. To see notes about each step and misstep, here is the link (PDF) to the Session Chart at the bottom of the post.
Session 1A: Drawing and block in in burnt umber
Session 1B: Started painting with color
Session 2: Painted all but gourd reflection
Session 3: Colored stripes and made gourd yellower
Session 4: Messed around with everything
Session 5: Done
Photo of set up
To see notes about each step and misstep, here is the link to the PDF Session Chart pictured above.
To see notes about each step and misstep, here is the link to the PDF Session Chart pictured above.
Have you downloaded a Session Chart? Do you find it interesting enough for me to keep uploading them? Do you prefer just seeing the work in progress steps without detailed commentary? Thanks for visiting!
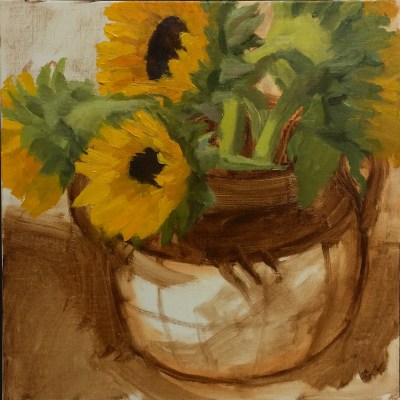
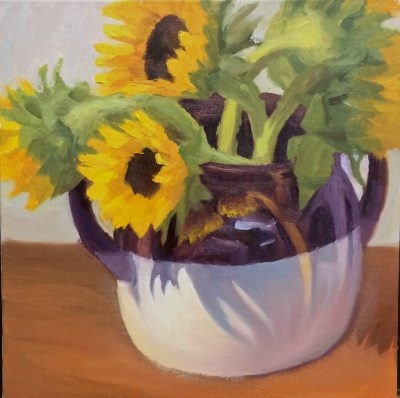
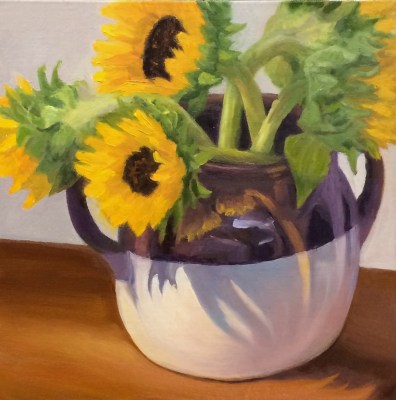
Sunflowers in Found Crock, oil on linen panel, 8×8 in. Click image to enlarge.
I found this wonderful old crock set out on the curb, adorned with a “Free” sign so I carried it home for my “Found Stuff” painting series. One handle had broken off but the owner had thoughtfully placed the pieces inside and I glued it back together. I love the way the flowers are reflected and shadowed on the crock. The painting is available here. Below are photos of the work in progress.
It takes two to paint. One to paint, the other to stand by with an axe to kill him before he spoils it. William Merrit Chase
My biggest painting goal is to stop what I call “unauthorized painting” — I finish part of a painting, like it and write my plan for that area: “Don’t touch it!” Later I decide to just do a little “touching up” and the next thing I know I am wishing for a “REWIND” button as I try to wipe off the “unauthorized” paint. Where’s the guy with the axe when I need him? I need to draw him, axe and all, and stick it on my easel!
Two Survivors, oil painting on linen panel, 7×5 in
Persistence, patience, perseverance, determination, curiosity, courage, confidence, wonder…these are all qualities needed to become a better painter. Another essential is learning to really see and understand the subject. I titled this painting (available here) Two Survivors because only these two survived from the big bouquet during the week I struggled with two previous sunflower “studies” (aka failed paintings). Sometimes it takes a while before the “blinders” fall away so that I can see the shapes, colors, and values instead of the named bits (e.g. petal, leaf, or nose) that interfere with seeing as a painter.
I was inspired by artist Chris Beaven (whose sunflower painting I purchased and love) by his Session Detail charts that he embeds at the end of each post (sample). I modified his chart to create one for myself to focus my goals and intentions for each session and the painting as a whole. Completing the chart at the end of each painting session with image, results and plans/goals for the next session is making a big difference in my process and helps me avoid random, unfocused messing about with paint.
Below is the chart I used for this painting. If you’d like to see all three session charts for this painting with my notes about goals, composition mistakes and corrections, and corresponding images, click here to open 3-page PDF file.
Session 1 Detail Chart (Click image to enlarge or click PDF link above to see all 3 sessions)
I loved the original painting of the vase in Session 1 above, with wonderful warm highlights and cool shadows created by the new LED lightbulb I’m experimenting with. My intuition told me to leave the vase alone but instead I started adding the pattern from the actual vase. After a few strokes I realized I didn’t like it and tried to wipe the pattern off the still wet paint. Then I tried to return to the original shapes of color, temperature and value.
I revised the chart layout after this painting. In my next post (another sunflower still life) I’ll include the completed chart for that painting’s 6 sessions and a blank template for anyone who wants to experiment using or modifying it for their own artwork sessions.
I had so much fun painting these dirty old baseballs my dog found at the dog park next to the batting cage at Albany High School. It felt like fun and play, not work while I was painting it and I’m really happy with the results. I’d been struggling to find my way with oil painting the past couple months, so it feels good to get my confidence back. Playing Dirty Ball is available on my DailyPaintworks site here.
The first baseball Millie found and tore apart had a computer chip, wires and a tag with different speeds on it deep inside. Is that normal for baseballs? She loved shredding that ball, gradually tearing off the leather, then unwinding the yards of tightly wrapped black twine until she finally got down to the wonderfully bouncy little black ball inside that she played with for weeks. At one point it rolled under the gate so she started digging a hold trying to get to it. I was surprised by the hole, worried she was trying to escape, until I found the ball on the other side of the gate.
Now that I’ve painted these dirty balls I can give them to Miss Millie for her shredding pleasure.