Categories
Drawing Faces Oil Painting Painting People Portrait

The Marcy Portrait Project: 6 Months of Trying to Paint My Sister

Marcy_#24-20160111_Sleepy_Sister_004-Edit-2
Marcy #24 “Sleepy Sister” Oil on DuraLar, 9×12 inches

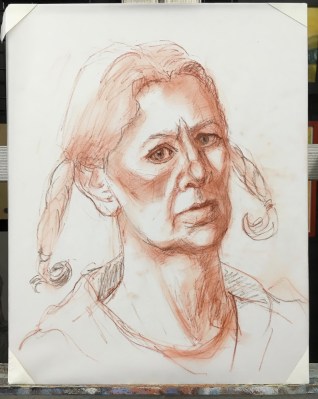
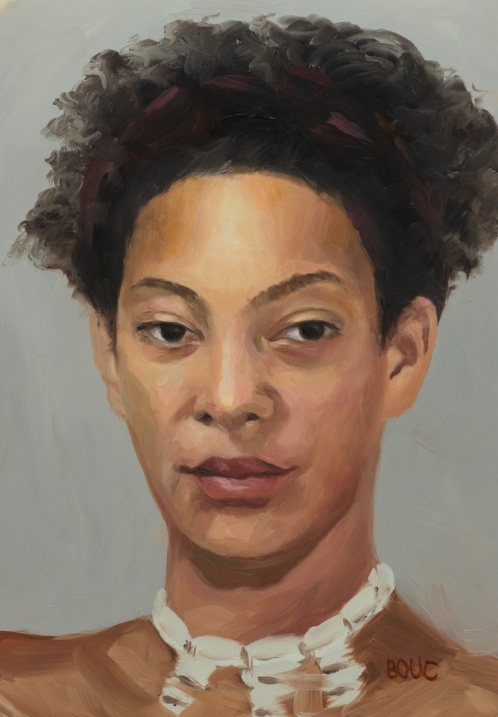
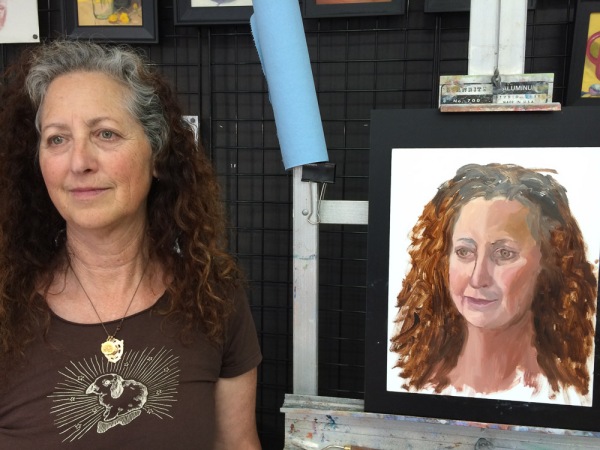
When my sister Marcy offered to pose for me for my birthday, I had no idea it would take me 6 months, more than 2 dozen mostly awful drawings and painting attempts (pictures at bottom of post), and lots of study before I could produce a portrait that actually: a) looks human and b) resembles my sister (as I see her).

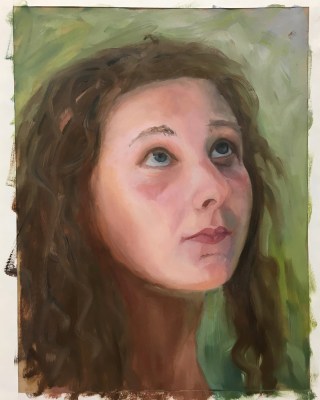
Although I have a long way to go before I feel competent at this, I am choosing to pause here briefly to honor and share my progress before I raise the bar again on my study of portraiture.

Attempt #1: painted live in about 2.5 hours. I learned how much I didn't know about alla prima portraiture.
Attempt #1: Painted live in about 2.5 hours. I learned how much I didn’t know about painting portraits

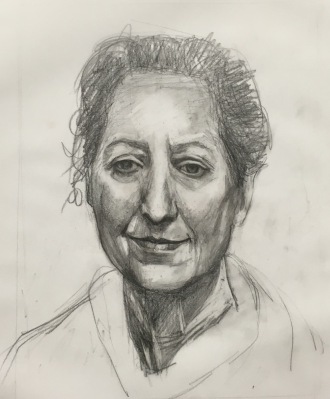
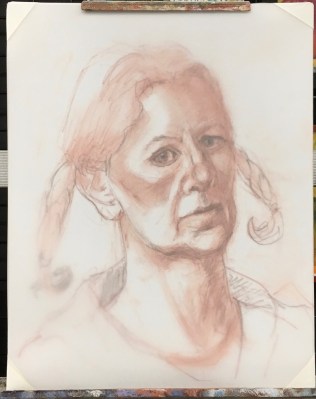
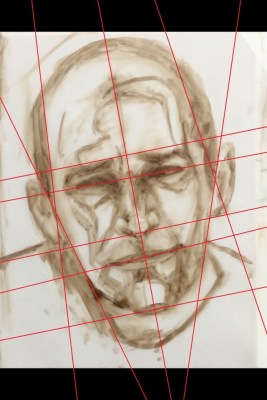
After my first try (above) and many more failed attempts (displayed at bottom of post) I realized I needed a better understanding of head anatomy. I accepted that I can’t fix a bad drawing with pretty paint. I studied my books and videos, tried to memorize proportions and divisions of the head (e.g. eyes are halfway between top of head and chin) and did some head drawing exercises (again…) that I still didn’t quite understand. And I continued failing at drawing and painting Marcy from the photo I took when she sat for me the first time, again from life on another visit and then from other photos.

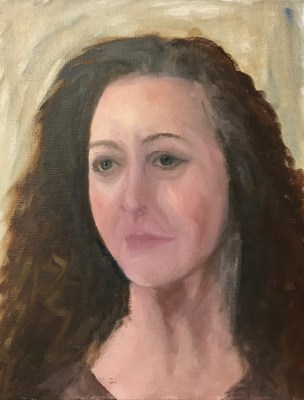
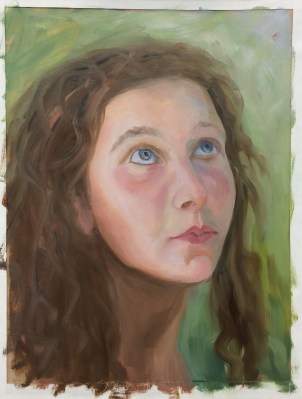
I’ve done portraits I liked in the past, either by drawing freehand and then correcting again and again, or by enlarging a photo and tracing it onto canvas or paper. But I just couldn’t reliably draw one from life. So I read more books, watched online videos and investigated in-person and online classes. I found a comprehensive online academy last month that is giving me just what I wanted to learn. I think you can see how it is making a difference, starting with #18 below, drawn from life when Marcy posed for me again. In my next post I will review and share links to the learning resources I found.

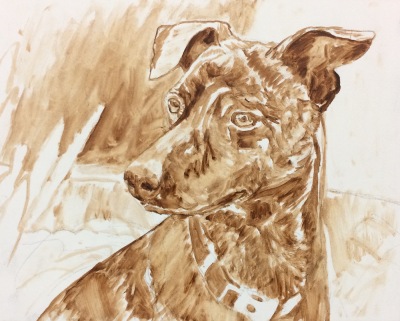
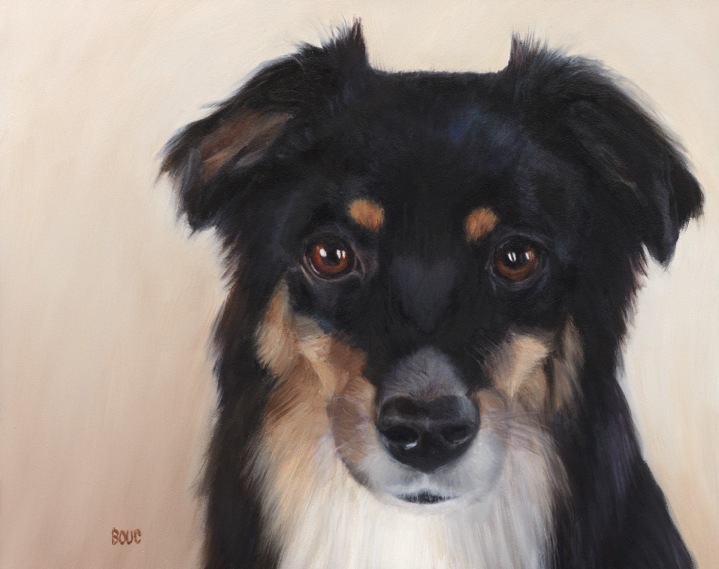
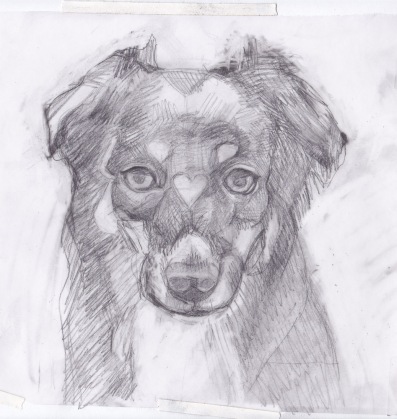
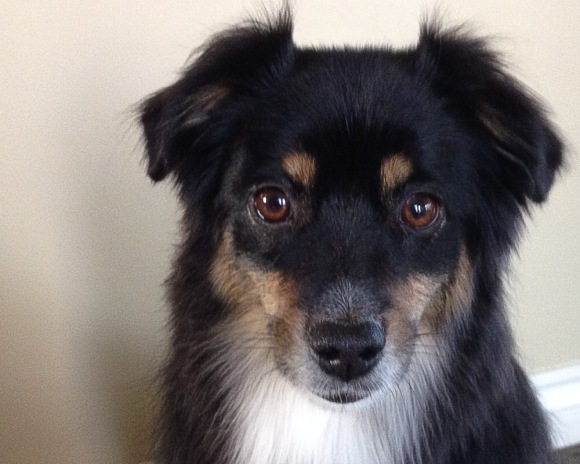
You can see the progression, from the hilarious to the hideous to the almost-but-no, sorted with most recent first. Some are just bare starts; as soon as I could tell it was unsalvageable, I added the piece to the pile of fails and started over. The paintings are all oil, 12×9″ on Matte Dura-Lar except for the earliest ones on panels. The drawings are mostly on Vidalon Vellum except for the first few 14×11″ on paper.

Categories
Faces Oil Painting Painting People Self Portrait Studio

Alla Prima Self-Portrait in Oil with Steps in Progress

Self-Portrait, Zorn Palette, oil on Mylar, 12x9 inches
Self-Portrait, Zorn Palette, oil on Mylar, 12×9 inches

I might look grumpy or serious from concentrating, a little cross-eyed (eyes drawn too close together), big-nosed and scrawny, but I’m really happy with this painting because it was fun to do! The hardest part was lighting my face without blinding myself with the glare.

Below you can see the setup I used in the studio, with the giant mirror I got for $10 (!) at Home Depot; it was half priced and had a few scratches so they took off another $5. I had a hard time supporting the mirror so that it was tall enough to see myself. Finally I found a solution: propped it up on an open drawer, held in place with two bungee cords wrapped around the studio chest of drawers.

Inspired by Myriam Yee (be sure to check out her amazing series of Zorn palette self-portraits here), I used the “Zorn” limited palette of Ivory Black, Cadmium Red Medium, Yellow Ochre and Titanium White. Myriam uses Williamsburg Cold Black instead of Ivory Black, which has some Ultramarine Blue mixed in and provides a wider range of colors. I bought a tube and am experimenting with it now.

I painted on Dura-Lar Matte Film again but this time (see previous post) I did the drawing on one sheet and then imposed a second sheet over it to paint on. This way, if I wanted to try a second painting of the same drawing or just want to save the drawing I still have it.

Categories
Art supplies Drawing Faces Oil Painting Painting People Portrait Portrait Party

Portrait Process: Start to Fail and Start Again

Forest Girl #2-C, Oil Painting on Mylar, 12x8"
Forest Girl #2-C, Oil Painting on Mylar, 12×8″

My first attempt at painting Sylvia, a lovely young Bulgarian architecture student, ended in an abandoned failure, displayed at the bottom of this post in 6 steps. I altered my course for the second attempt (above), starting with a better drawing, and was able to complete the study more successfully. I tried to practice for alla prima painting, not going for a “finished” portrait, even though I painted from her reference photo on Julia Kay’s Portrait Party, instead of from life.

What made the difference between failure and success was that I took the time to make a more accurate drawing first (above). I drew on one side of a sheet of Dura-Lar Matte Film (after first reversing the reference photo in Photoshop) and painted on the other side. Then I turned the sheet over, toned it with a transparent umber stain, and reversed the photo back to normal. That way I had the lines of the drawing to refer to, along with the photo without obliterating the drawing. It’s still visible on the back of the painting and could be traced over onto another sheet of Dura-Lar if I wanted to paint her again from the same drawing.

Below is the failed first attempt, where impatience and hubris led to a quick, sloppy drawing (with the evil thought, “I can always correct the drawing when I paint,” which I need to ignore in the future!). The captions describe what went wrong at each step:

Categories
Faces Oil Painting Painting People Portrait Sketchbook Pages

Portrait of Nick for Julia Kay’s Portrait Party

Nick K for JKPP, oil on Mylar, 9x12
Nick K for JKPP, oil on Mylar, 9×12 inches

Wanting to continue my alla prima portrait painting practice but without a live model, I picked a photo of Nick K. from Julia Kay’s Portrait Party to paint.

I recently looked up the saying, “Perfection is the enemy of good” and read about the Pareto principle, the 80/20 rule or the law of diminishing returns that states it “takes 20% of the full time to complete 80% of a task, while to complete the last 20% of a task takes 80% of the effort.” This is so true with my painting. I can enjoy and complete the majority of a painting in 6 hours or less and then easily spend another 60 hours tweaking, finessing details, and overworking it until I’m sick of it. I stopped painting this one as soon as I’d said what I had to say, way before I usually consider a painting “finished,” but also long before it stops being fun.

After toning a sheet of Mylar (see previous post) with raw umber and letting it dry, I sketched out the image in thinned raw umber. Then I took a photo on my iPhone and using the Miira app, traced lines on my drawing to compare it to the original photo (first photo below). I could see I’d completely missed the boat and started another sketch on a fresh sheet, tested it again, and decided I was close enough to begin painting.

Later, I realized the mouth was in the wrong place and moved it. I discovered that when you turn a painting on Mylar over you can see the original drawing through the film (see the red arrow on the reversed image below, pointing to where I moved the mouth). I’m really trying to see the shapes and planes that make up the face and head. Holding up a bamboo skewer or knitting needle along the angles and “plumb lines” of the face really helps to visualize what lines up with what, and is helping my drawing tremendously.

Categories
Art supplies Faces Oil Painting Painting People Portrait

Portrait of Pigeon Plumtree III

Portrait of Pigeon, oil on Duralar Matte, 12x9"
Portrait of Pigeon, oil on Mylar Duralar Matte, 12×9″

I took a fantastic 1-day Alla Prima Portrait Workshop with the amazing Elizabeth Zanzinger at her studio in Oakland. I spent most of the day watching and listening to her, which was my goal; to observe and learn from her. It was a revelation to see her approach to alla prima painting, which begins with dots to mark the edges of shapes and features and then proceeds with small tiles of color and value painted along the planes of the form. You can see her completed demo painting on her Instagram.

In the late afternoon I started my own painting but ran out of time. Fortunately, our model, the exquisite Pigeon Plumtree III, generously allowed us to take photos of her for a small fee. Although my iPhone wasn’t quite up to the task because of the lighting, it gave me enough information to make another attempt at painting her.

We painted our portrait studies on Mylar Dura-Lar Matte Film, similar to the Canson Vidalon Vellum that Sadie Valeri uses, but twice as heavy. Elizabeth tones the Duralar first with a thin film of raw umber which she allows to dry before starting to paint. I absolutely love painting on this surface; it is so smooth but not too slippery and very forgiving. It’s archival and can be mounted to a panel later to be framed.

Below are a few steps in the work in progress. Click any image to enlarge or view as slide show (and then click the x in the top left corner to return to this page).

Categories
Art supplies Oil Painting Still Life

Studies from Sadie Valeri’s Alla Prima Still Life Workshop

Avocado and Pear, oil on panel, 10x8"
Avocado and Pear, oil on panel, 10×8″  Available. Click image for purchase information.

I took a wonderful Alla Prima Still Life workshop from Sadie Valeri recently and really enjoyed the class. She is such a generous and knowledgeable teacher. I really appreciate the way she is able to verbalize what she’s thinking as she demonstrates and how organized and thorough her teaching style is. I got this one nearly done before the end of the day and finished it up at home from memory.

Oil on Canson Vidalon Vellum, 8x8"
Lemon Studey, Oil on Canson Vidalon Vellum, 8×8″

We started the day by doing a lemon study on Canson Vidalon Vellum. What a great idea for a painting surface for studies–so much cheaper than using panels or canvases. Taping it to a board with a piece of white or grey paper underneath works great. This was a limited stroke painting, done quickly as a warm up to practice laying in colors in little color chips, side by side.

Categories
Animals Oil Painting Painting Sketchbook Pages

Mika, Formosan Mountain Dog Portrait

Mika, a Formosan Mountain Dog portrait in oil paint on linen panel,, 10x8 in
Mika, a Formosan Mountain Dog portrait in oil paint on linen panel,, 10×8 in

This little cutie was a fun challenge to paint. Below are some steps along the way, including the reference photos that I joined and edited in Photoshop to simplify the background and combine the tops and bottoms of her ears. Her ears were too tall in my first sketch (done in gouache in my journal). I must have added extra length when I assembled the two photos in Photoshop so edited them down to life-size in the painting.

Mika’s owner was happy with the painting and noted that Mika, who is a playful goofball in real life, seems so dignified in the painting. That gave me the idea to ask owners to also provide videos of dogs I’m to paint in the future so I can get a better sense of their personalities. I tried to include some of the family’s garden in Mika’s portrait but I struggled with getting the spring flowers to behave in the background. I painted over them with sky, planning to try them again, but when I sent Mika’s owner a photo of the painting with the sky background, she liked it better that way and so did I.

Categories
Animals Drawing Oil Painting Painting Sketchbook Pages

Leo Take Two: Same Dog, Revised Painting

Leo, Dog Portrait, Take Two, oil on panel, 8x10
Leo, Dog Portrait, Take Two, oil on panel, 8×10

After I varnished Leo’s painting and was going to deliver it to the family that commissioned it, I realized I wasn’t satisfied with the background. I asked for and was granted permission to adjust it. It’s a good thing Leo’s people are very patient: I asked for an extra two weeks but then my dog Millie started having epileptic grand mal seizures and my cat Busby got sick and I was spending more of my time nursing animals than painting them.

Finally, after many visits to the emergency vet hospital, my family vet, and a veterinary neurologist (thank goodness for pet insurance) Millie has stabilized on her meds (no seizures in over a week), and Busby has sadly has passed on to Kitty Heaven. He was a beautiful cat and my remaining kitty Fiona misses him, even though he was a bit of a bully, like big brothers can sometimes be.

Back in the studio I explored how to rework the background. What bothered me was the way the it divided the painting in half vertically and how vague it was. With my realistic approach to the dog, it felt like the background needed more detail so I tried to suggest some of the actual greenery in Leo’s Northern California backyard (see photo below) and added some sky to add depth.

Below, copied from the previous post, are the reference photo and the work in progress before I got to the finished painting above.

Categories
Sketchbook Pages

Leo: A Dog Portrait in Oil and Gouache

Portrait of Leo, Formosan Mountain Dog, oil on panel, 8x10 in
Portrait of Leo, Formosan Mountain Dog, oil on panel, 8×10 in

Leo is the same breed as my pup Millie, a Formosan Mountain Dog (both rescued from the streets of Taiwan), except Leo has dark brindle fur which I found much more difficult to paint than Millie’s blonde fur, especially when working from a photo (at bottom of post) without much variation in light and shadow to help create dimension and volume on a surface that is already so varied and random.

Study for Leo Dog Portrait, gouache on paper, 8x10 in
Study for Leo Dog Portrait, gouache on paper, 8×10 in

Before starting the oil painting I did the above quick gouache study to send to the collector who commissioned the painting to give her a sense of what I was planning. I hadn’t decided yet whether to include their backyard.

Below are a few steps during the work in process and the original photo I worked from.

I got really interested in painting the ferns on the left in the photo but decided to simplify the background, which was attracting my eye more than the doggie. I changed Leo’s fur coloring a bit in the painting based on some additional photo references that showed the fur as being darker and warmer-colored than in this photo. I’m so glad Leo’s people are happy with the painting!

Categories
Animals Oil Painting Painting

Whiskey: A Mini-Aussie Dog Portrait

Whiskey, Portrait of Mini Aussie, oil on Gessobord panel, 8x10 inches
Whiskey, Portrait of Mini Aussie, oil on Gessobord panel, 8×10 inches

I had so much fun painting Whiskey, a Miniature Australian Shepherd, for her owner Diane. I started with a rough sketch (below) on vellum tracing paper (erases easily and is strong) and that’s when I discovered the heart-shaped spot above her nose. I’m not sure if it’s just a reflection or an actual marking in her fur but it was one of those joyful discoveries that happen when you look closely at things.

Preliminary sketch of Whiskey, graphite on vellum tracing paper, 8x10 inches
Preliminary sketch of Whiskey, graphite on vellum tracing paper, 8×10 inches

After sketching her, I printed out an 8×10″ copy of the photo and traced it onto the Gessobord using a sheet of graphite Saral Transfer Paper between the photo and the panel. Ideally I would work on a drawing until it perfectly matched the photo and then transfer the drawing to the panel, but on commissions I need to work a little more quickly than my imperfect drawing skills allow.

Below are 1) my painting and my reference photos, 2) cropped and 3) original. Isn’t she incredibly adorable!