Skull and Hydrangeas, Digital sketch in Procreate on the iPad
Above is my lovely plastic skull replica I named Morton Skullman with a bouquet of hydrangeas from my garden in my grannie’s milk glass vase. I’m continuing to experiment with simplifying light and dark and abstraction.
LOL! I just realized that Morton’snickname, “Mort” means “DEAD” in French!
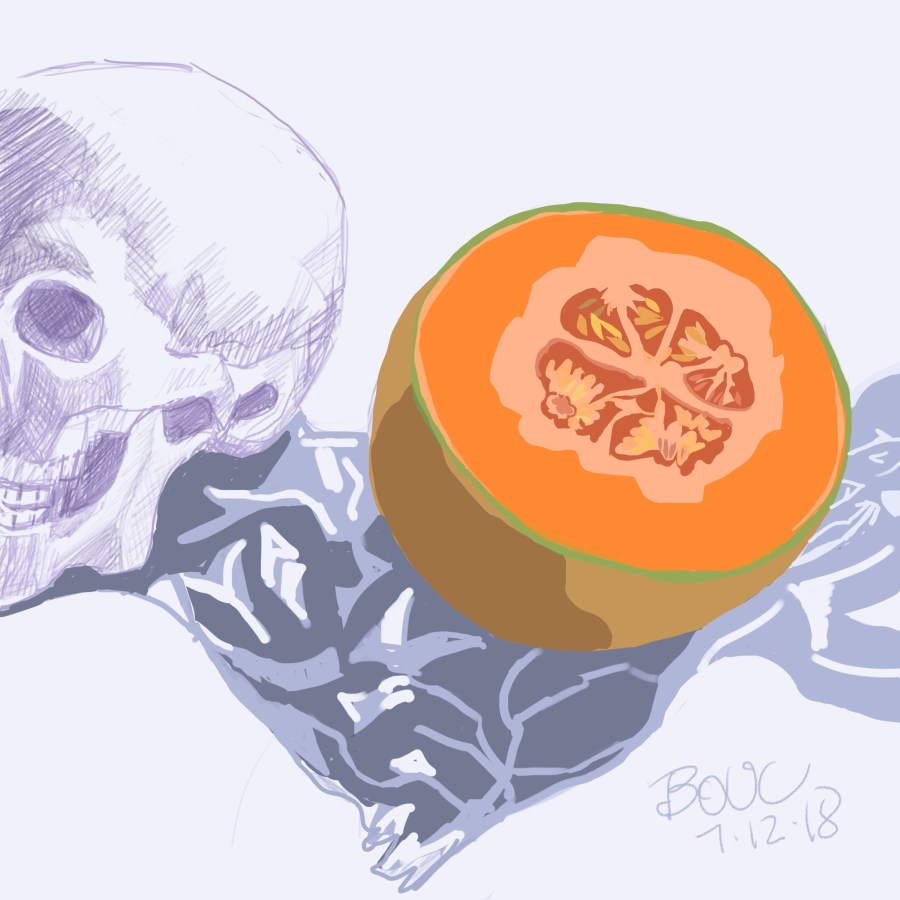
Below is Mort with a cantaloupe that’s bigger than his head and below that is Mortie wearing Grandpa Simon’s old fez from his days as a Mason.
Mortie Skullman with Cantaloupe, Digital sketch in Procreate on iPad.Bonus Skull sketch…Morton Skullman in Grandpa’s Mason Fez in Procreate
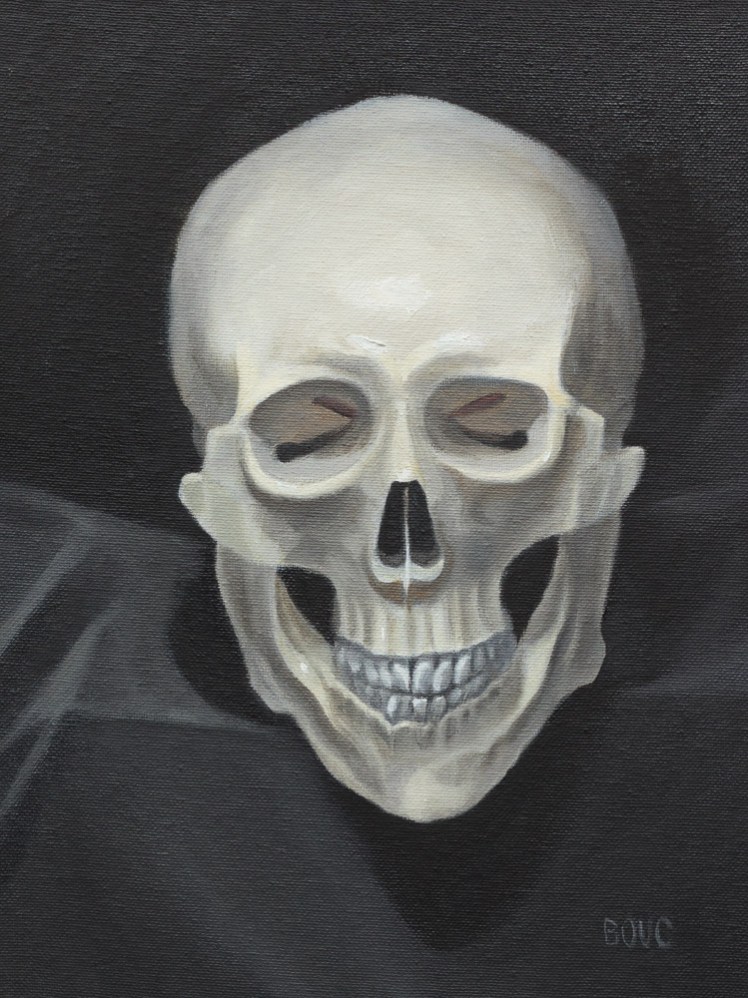
Morton Skullman the Man Skull study, oil on panel, 12×9″
I painted my skull model, whom I call Mortie Skullman, to kick off my painting for 2015 since my plan for this year is to focus on portraits, mostly of people (but also of dogs of course, my favorite subject). The process I followed for this study was based on the approach David Jon Kassan takes on his online skull painting video, “Premier Coup” (only $1.95 to rent for 1 week). It was fun painting along with him, taking inspiration from the thoughts he shared as he worked.
The process starts by drawing and blocking in with PanPastels using Sofft Tools and then moves on to oil paints. You can paint over PanPastels without need for drying time or fixative and they can be completely erased with any eraser, making them ideal for underpainting.
Below is the setup and most of the painting sessions in progress.
Halloween City Masks and Punkin Pups, ink & watercolor, 8×5″
We had so much fun sketching at Halloween City, a popup store in the former Petsmart in Albany (next door to Berkeley). They had a great sound system and were playing a variety of good music from stormy classical to Halloween-themed pop hits and dance music.
The Spooky Butler: “Skulls anyone?” ink & watercolor, 8×5″
Along with all the costumes, masks, props and decorations they had a bunch of displays with computerized life-sized ghouls that pop up or start talking or laughing. This spooky butler was part of one of those displays.While I was drawing him the store manager had to climb into the display to change one of the ghoul’s suits. I wonder why.
They also had some inexpensive skeletons and skulls that were close enough anatomically to the models I’ve wished I could afford for studio anatomy practice that I may go back and buy one.
Smiley Skull and Smiley Guy study, HB pencil, 4x6"
In preparation for my Alla Prima Portrait Painting workshop with Rose Frantzen next month, I wanted to work on my drawing skills so I can keep up in class. Although I draw all the time, I discovered I really had no understanding of head and facial construction.
Skulls and Faces in the Same Positions, HB pencil, 11x9"
I usually draw what I see, compare shapes, angles and plumb lines to try to get some accuracy, but I don’t worry about it too much. That wasn’t cutting it when it came to drawing heads.
So I turned to the great book by Andrew Loomis, recently back in print, Drawing the Head and Hands. His books are also available as PDFs here on the web. There is an excellent explanation with clear examples of the Loomis approach here on Stan Propopenko’s blog so I won’t go into it here. All of my drawings in this post started with the Loomis ball divided in thirds with the jaw then added on.
Skulls and Muscles from Loomis book, 11x9"
I worked through the Loomis book and when I came to his skull and muscle drawings in the book I tried copying them (above). I also tried some other books’ methods of constructing heads (using an egg shape, a block, double ovals, etc.) but none worked as well as the Loomis approach.
I wanted to do more than copying sketches so I started drawing skulls and people I found on a Google image search, drawing the people in about the same position as the skulls (the two pics at top of post and the one below).