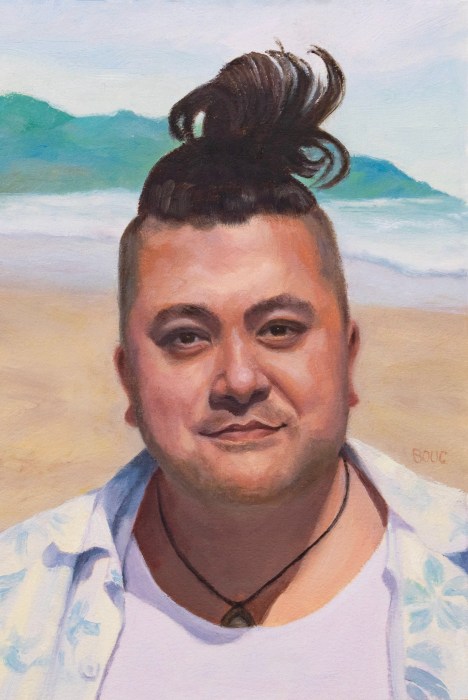
When I saw a photo of this guy, I loved his funny rooster-tail man bun and made him my next portrait victim. I decided he was Hawaiian, gave him a tan and put him in a happy beach scene (see below for the process). It was fun to try to create the effect of bright sun on his shirts.
Original reference photo from Pinterest
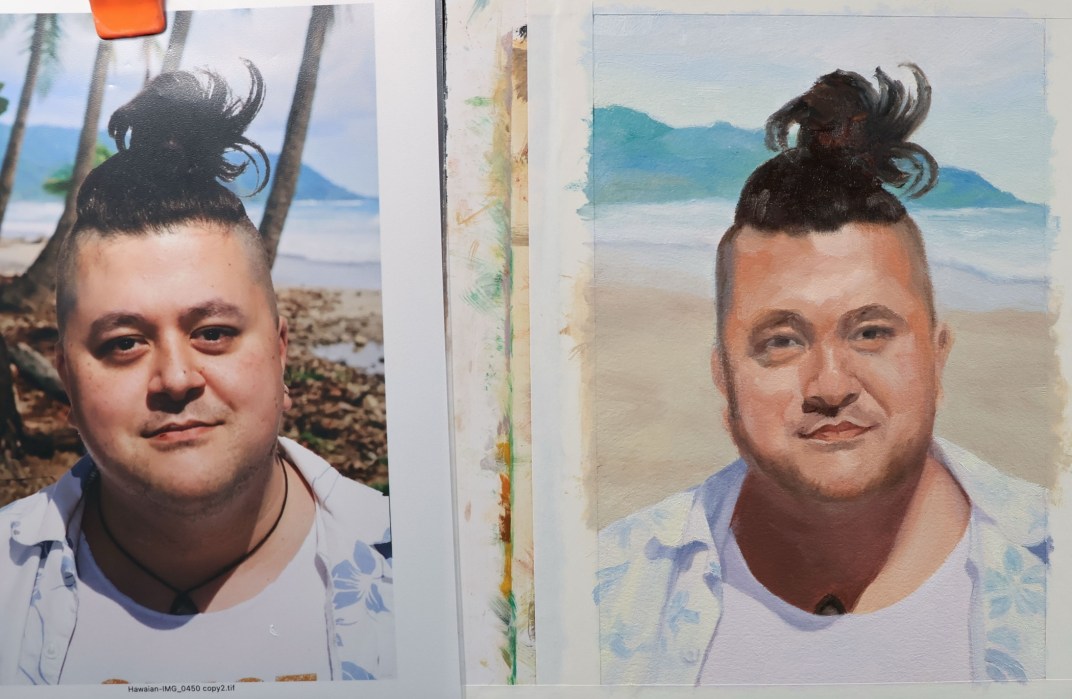
(Left) Combined reference photo; (Right) first layer of oil paint
Above on the left is a composite I assembled in Photoshop for the reference photo. I can’t remember if I found the beach scene on Google or used Photoshop’s AI Generator to create it because I tried so many different things.
Summer Selfie, Oil on Shellacked Arches Oil Paper, 9”x 6.5”
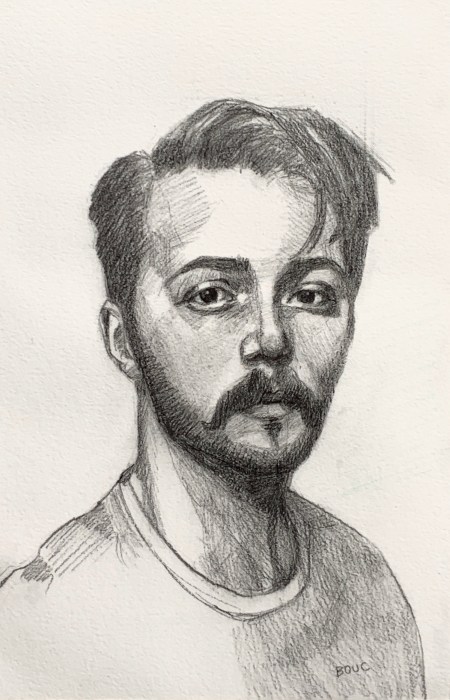
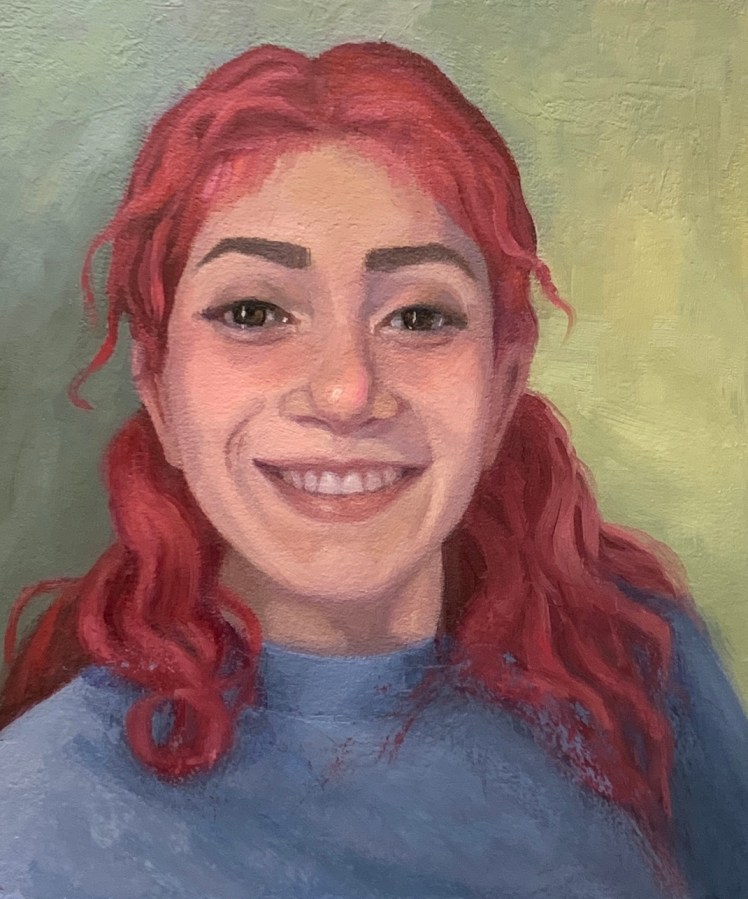
After the wig experiment I got even braver and cut my hair very short for the first time since I was about 12. I was going for something spiky, between Laurie Anderson and a pixie cut but this is what my curly hair wants to do.
I painted the oil sketch above from a photo as a test for using shellac as an archival primer/sealer/ground on paper. I used the Zorn palette (black, white, cadmium red and yellow ochre).
I got bored after painting my head so everything below my chin is pretty rough.
Getting Started with Shellac
Although it comes in a colorless formula, I bought amber shellac so that it could seal the paper and tone it at the same time (and it’s easier to see what you’ve covered). Since it’s transparent you can do a drawing with pencil or charcoal on the paper and then shellac over it and still see your drawing. (See below)
Shellac Over Pencil Sketch on Paper
Fun fact: Shellac is made from a substance secreted by female (she?) Lac beetles to make their tunnel-like tubes on tree branches. It is harvested by scraping it off those trees in India.
Shellac dries super quickly (in under 15 minutes) by evaporating out the denatured alcohol, which is the liquid the shellac is dissolved. It barely smells at all but it’s still good to have ventilation.
It’s best to make it fresh from flakes, but since I can’t buy denatured alcohol in California to dissolve it in, Zinsser canned shellac is my only option. You buy it at the hardware store, not the art store.
Application: It should be stirred first (not shaken). Then you can apply it with a cheap hardware store bristle brush (or a nicer one if you can get denatured alcohol or don’t mind using ammonia to clean it). Supposedly you can also let the brush dry without cleaning it and when you put it back in the can it will soften and be ready to use.
You can also apply it with a rag, a squeegee or anything except a sponge brush according to the hardware store guy. For this first experiment I just spread it with a flat paint stirrer stick and it worked fine and made a nice variegated background.
I really like the interesting painting surface that shellac provides—not too slippery like acrylic sealant but not so dry/absorbent like gesso or Arches Oil Paper without sealant.
A Few Tips and Mistakes to Avoid
For more shellac tips, watch artist Aimee Erickson’s video demo on using shellac to prime pages in a sketchbook for oil painting.
Shellac is thin and as it turns out, quite splashy. After I applied the shellac to my paper, I put the lid on the can, and, as I usually do with my gesso bucket, I tapped the lid with my rubber mallet to seal it. That sent golden shellac from the rim of the can splattering all over my table, the wall, a framed (in glass fortunately) painting on the wall and everything on the table. Now I carefully wipe the rim before tapping it with the mallet.
I did the drawing for this painting directly on the shellacked paper. Even though I had pretty good luck with the drawing, I still needed to do some erasing and redrawing. That roughed up the surface unpleasantly in some spots. Shellacking over a drawing may be a better solution.
I tried shellacking 140 pound cold pressed watercolor paper instead of Arches Oil Paper for another painting. Even though it does seal the paper, I found the painting surface quite unpleasant, and won’t do that again.
This commissioned portrait of a darling little girl was really fun to paint but had some challenges, like trying to invent the pajamas hidden by the highchair straps. It took several drawings (including one of a baby skull I found on Google) before I was ready to move ahead with the painting as you can see in the process steps below.
Emi’s face was actually easier to paint than the pajamas, and I was tempted to keep working on them, probably forever, but the friend who commissioned the painting was happy with it as is, so I am too.
Below is some of the work in progress steps. Please note that the lighting changed the colors in some of the photos.
Mimi at Marcy’s, oil on Arches Oil Paper, 9.5″ x 7″
Although I’m happy with this pre-quarantine composition and painting, I regret not checking the drawing before beginning to paint. I sensed something wasn’t right and sure enough, when I did the digital tracing (below) I found my mistake, but it was too late. I’d either need to start over or let it go.
When drawing/painting people I ask myself, “Does it at least look human, if not that specific human?” Hmmmm. Well, I guess I can celebrate the parts that worked and let go of mistakes and remember to check my drawing next time! Also I might be coming to believe that sometimes the anatomy isn’t as important as the feeling I’m trying to convey, and that caricature or distortion might be ok (though it’s probably better when it’s intended).
This was one of those paintings that just flowed and was fun from beginning to end. I started with a drawing in pencil (below) on Arches Oil paper and then applied a layer of Golden GAC 100 acrylic sealant over the sketch to make the surface less absorbent and more slippery.
Graphite sketch of Dylan H from Sktchy, 11×7″
My goal for this painting was to stop as soon as the painting said what I wanted to say and before things got over-worked, overly perfected and I’m pleased to say that’s exactly what I did. Sure, there are many things that could be better but I like it just the way it is.
The images below show the steps in the process, from the graphite drawing, to an umber underpainting, to the block-in and final layer of paint.
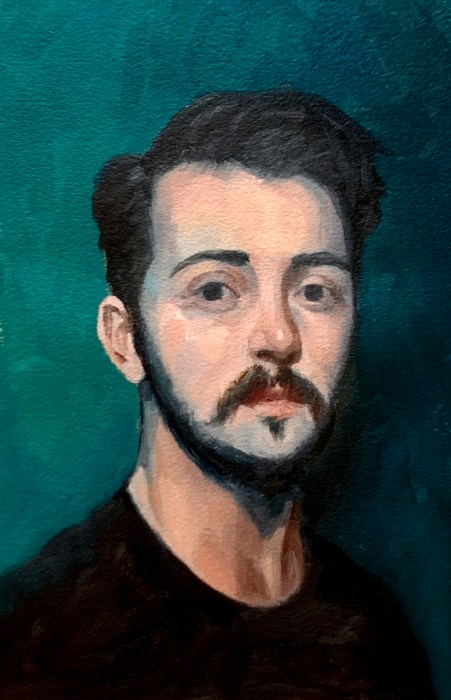
Oil portrait of Dylan H from Sktchy, 11×7”
WIP, initial block-in completed
WIP, initial block-in neck and ear not yet painted
Underpainting in Raw Umber
Graphite sketch of Dylan H from Sktchy, 11×7″
My sketch and the Sktchy app reference photo on my iPad
Completed painting and the steps leading up to it.
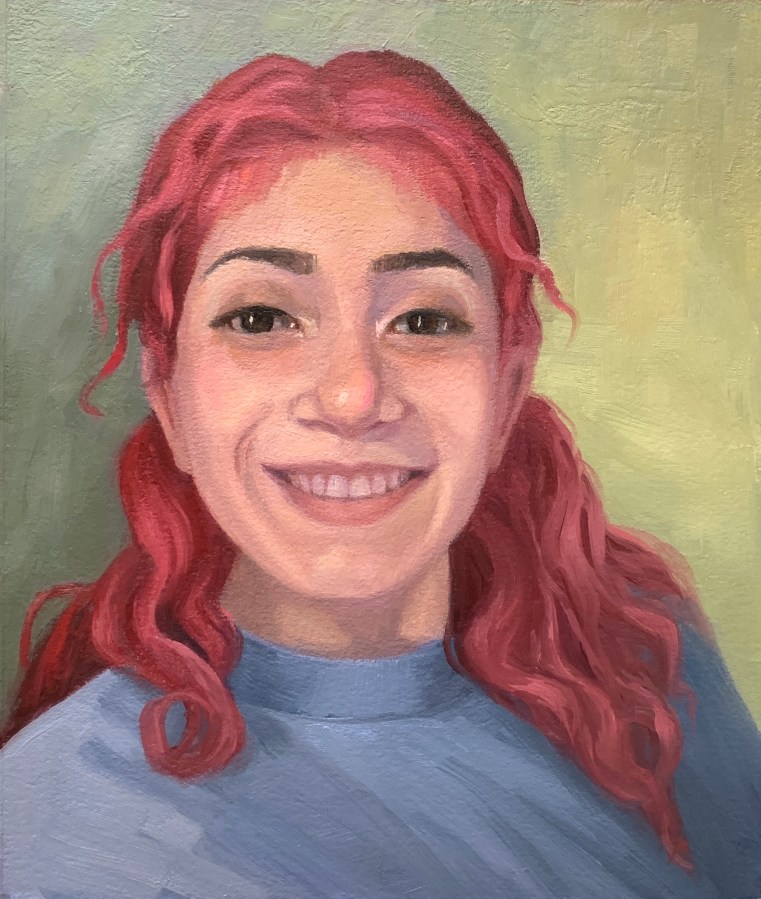
Portrait of Dayris, Oil on Arches Oil Paper, 10″x8.5″
I’ve had so much fun painting and sketching the lovely Dayris from Sktchy in oil (above), and before that, in pencil and then doing a digital sketch in Procreate (below). Also below you’ll find a slide show of the work in progress. Doing the two initial drawings really helped me quickly get a pretty accurate drawing for the oil painting. You can see her reference photo on Sktchy here.
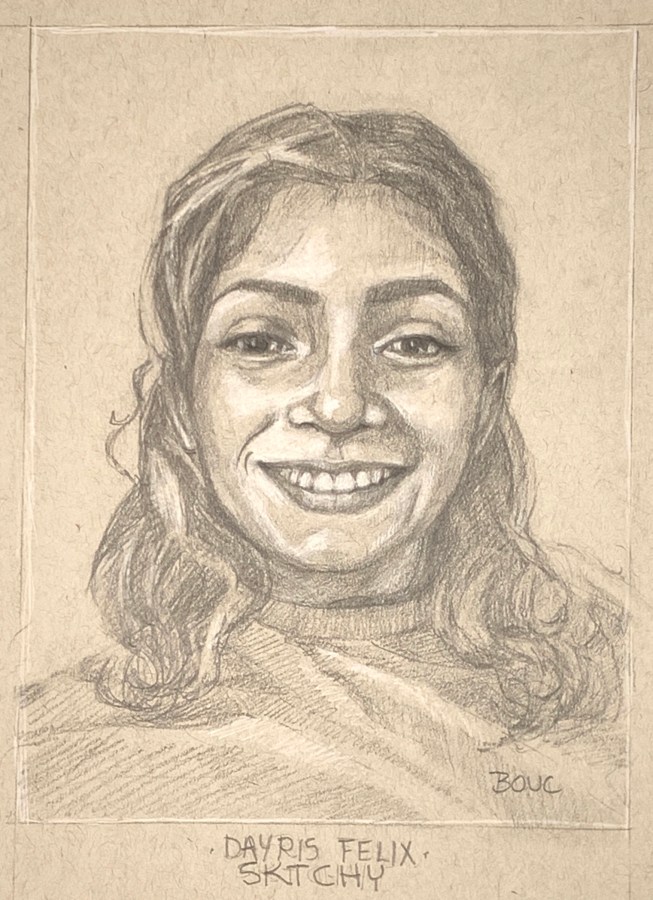
Initial pencil drawing of Dayris, 12×9″
Digital Sketch of Dayris in Procreate
Below are the steps in the process of making the portrait.
Initial pencil drawing of Dayris, 12×9″
Digital Sketch of Dayris in Procreate
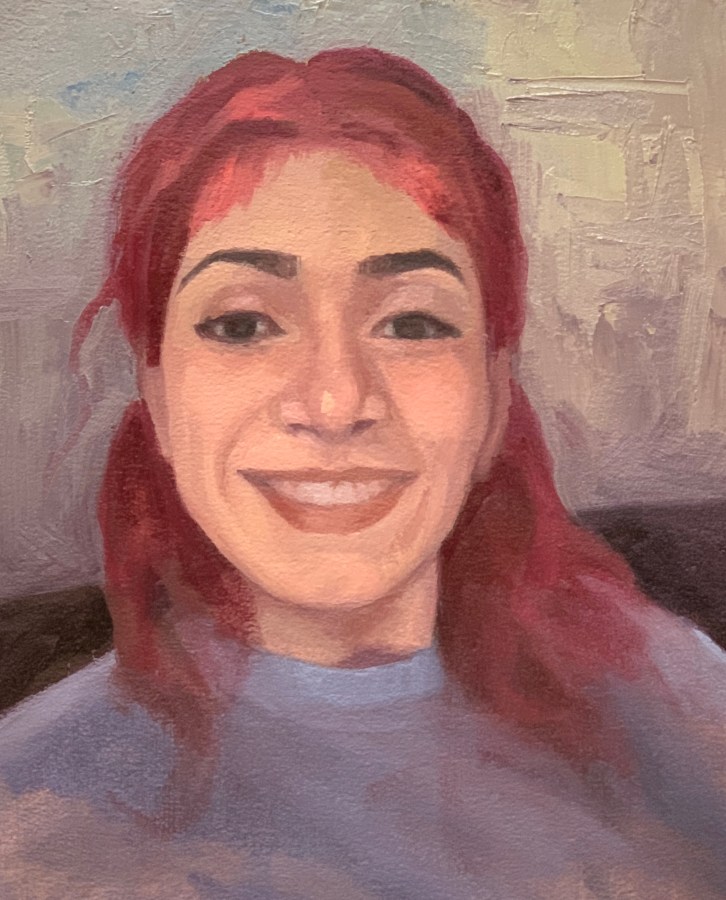
Umber underpainting
Some background and shirt
Some paint on face
Icky background in with palette knife
More work on background, still icky
Background better but not happy with shirt or hair
Almost done
Scraped off shirt and some hair to redo
Portrait of Dayris, Oil on Arches Oil Paper, 10″x8.5″