Categories
Life in general Other Art Blogs I Read Outdoors/Landscape Photos

Eternal (& Happy Birthday Sis)

Eternal

Larger

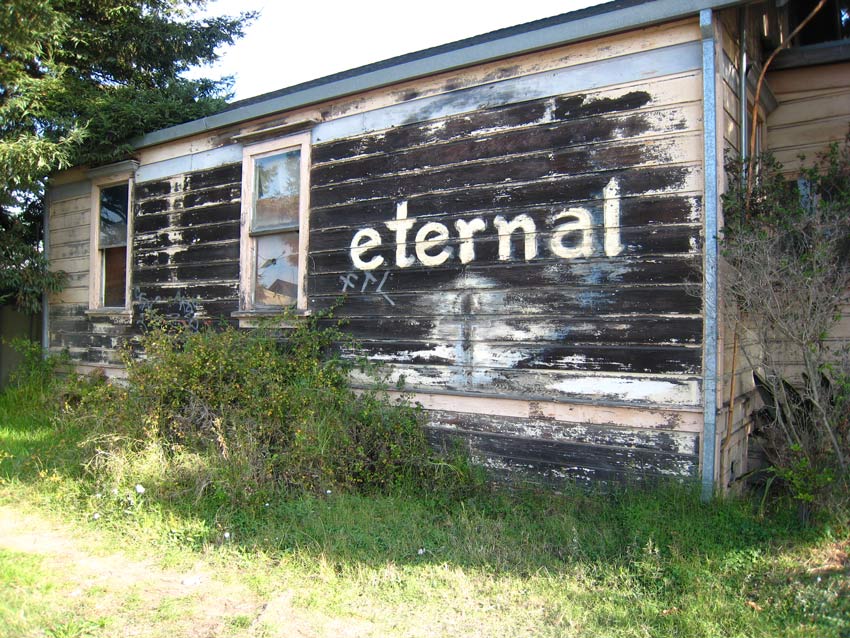
I took this photo of an old house near Berkeley’s upscale 4th Street shopping area. There’s something about the image that I find so evocative.

Today is my sister Marcy’s birthday, and while I’m thinking about birth, eternity and old houses, I invite you to visit the Blue Lotus Project (click on Craftsman Home) where you can see the amazing rebirth and transformation of her home, a former fixer-upper (or tear-it-downer as I called it).

The house had been severely neglected for decades and everything was rotten and moldy. It was so awful that I thought it should have been torn down. But Marcy and her husband Tim had a vision of what it could be. After several years of hard work, it became the beautiful home they envisioned, and the place where our family meets for holiday gatherings and all of our rites of passage.

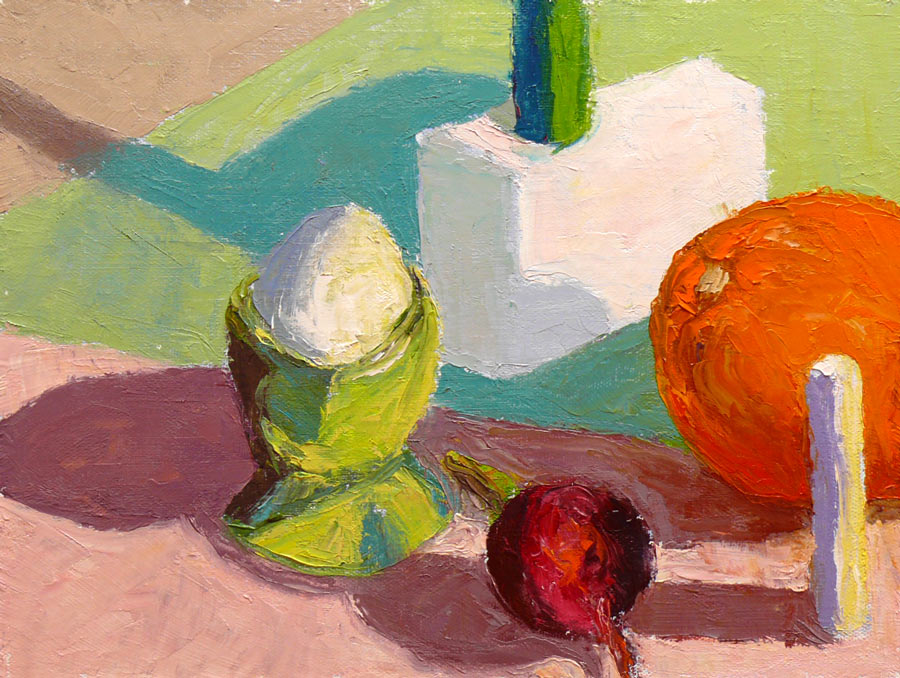
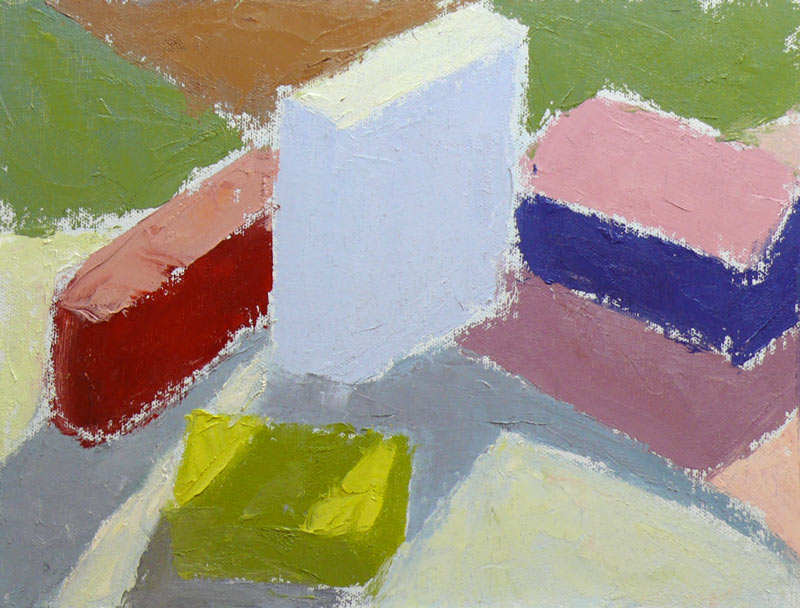
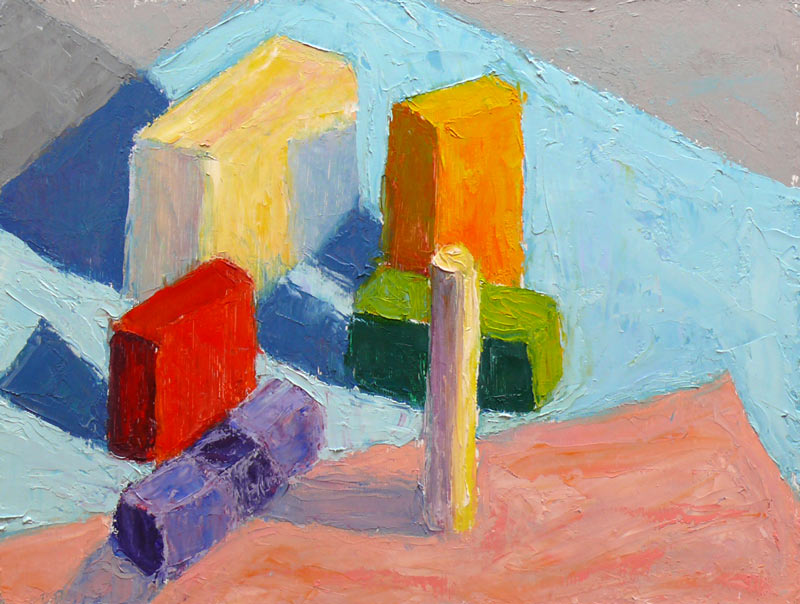
Tim is a contractor, fine woodworker, and master carpenter; Marcy is a brilliant interior designer and space planner; both are talented fine artists as well. They are co-partners of the Blue Lotus Project, a San Francisco Bay Area design/build company.

To see the amazing before and after pictures of the rebirth, click on “Craftsman Home” on their Blue Lotus Project website. There are more of Marcy’s interior designs on the Marcy Voyevod Design website and her her paintings are here.

I know sisterhood isn’t eternal, and I am so grateful for every moment we have together in this life!

Happy Birthday Li’l Sister!

Categories
Art theory Oil Painting Other Art Blogs I Read Painting Photos Plein Air

Learning to See Color

Color study with blocks and food

Oil on panel, 9×12″ (Larger)

On Monday mornings I’m taking a painting class from Camille Przewodek in Petaluma. I first read about her on Ed Terpening’s blog and when I saw her absolutely stunning work I was thrilled to be able to study with her.

As I understand it, the focus of her class is learning to develop one’s ability to see light, atmosphere, and their effects on the subject one is painting and to develop the ability to interpret that in paint. Camille bases her teaching on Henry Hensche‘s, with whom she studied and then spent many years further expanding upon his work. Hensche was a student of Charles Hawthorne who was a student of William Merrit Chase, an American Impressionist who developed his color theories via his study of Monet‘s groundbreaking work.

Camille’s paintings are simply stunning. A slide show of her paintings brought tears to my eyes with their beauty…something that has only happened to me once before when I saw Renoir’s Luncheon of the Boating Party in person.

Newcomers to the class begin by doing plein air still life color studies of colored blocks. Using blocks simplifies the subject matter in order to focus on using changes in color hue and temperature to create the illusion of form and depth. There’s an explanation of this process in the book, Painting the Impressionist Landscape: Lessons in Interpreting Light and Color by Lois Griffel, who took over Hensche’s art school after he died.

Color Study plein air with blocks

Oil on panel, 9×12″ (larger)

Above is the first block study I did in class while everyone else was painting beautiful marshland. The process for doing the studies is to block in the masses with a palette knife, leaving white space between color areas, breaking each shape into two values: shade and light. You start with one color and move to the next, focusing on the relationship between each color and the next.

Elio Camacho, my other wonderful painting teacher, also strongly emphasizes the importance of the relationship between contiguous colors. They both explain that there’s no such thing as a “muddy” color—that the appearance of muddiness results from the relationship not being right between a color and it’s neighbor.

Color Study, cloth lightened

Oil on panel, 9×12″ (Larger)

The one above was done at home under a bright light, trying to simulate sunlight on a dark and rainy day. When I brought the original version of this painting to class for critique, Camille pointed out that blue cloth was too dark because in the bright light it shouldn’t be darker than the shadow on the white block so I worked on it some more, lightening the cloth. If you want to see how it looked before, and the steps in getting there, including the photo of the blocks, just click “continue reading” below.

Categories
Art theory Dreams Faces Oil Painting Other Art Blogs I Read Painting People Photos Portrait Studio

Dreamt about Jack Nicholson so I painted him

Oil on canvas panel, 12×9″ (Larger)

I had a fun dream that I was on a date with Jack Nicholson so the next day I decided to paint his portrait. (I wouldn’t really want to date him–I think he’s scary but fascinating.) I downloaded some photos from the web, picked this one and set it up on my computer monitor.

In Photoshop I cropped the photo to 12″x9″ to make it the same proportions as my canvas and then set Photoshop’s grid to divided the image into thirds. Then with charcoal I drew the same grid on my canvas panel (dividing it into 9 rectangles). That made it easier to correctly sketch in the shapes that make up the face.

Here’s the set up with the painting nearly done. It so great to be able to work from the monitor instead of a printed photo though it still can’t compare to working from life:
Jack Nicholson portrait in progress
(Larger) (Alison and Pete your artwork is visible on my bulletin board, along with some other inspiring artists’ work)

When I thought I was done, I looked at both images in a mirror and saw a bunch of problems that needed fixing. I flipped the photo 180 degrees in Photoshop and turned the painting upside down too. That made it easier to spot and corrent problems as shapes instead of facial features which is harder. I wasn’t going for a perfect finished portrait, but rather was trying to have fun and continue practicing with oils.

While I was working was listening to a historical novel about Pierre-Auguste Renoir and the making of his famous painting, Luncheon of the Boating Party (my favorite impressionist painting of all time–it made me cry when I saw it in person). I’m enjoying Susan Vreeland’s book of the same name, but I can’t imagine a non-artist enjoying it as much, since it goes into great detail about colors, composition, art theory, and the struggles and joys of painting from life.

Here are a couple of great quotes by Renoir that I really loved:

“I always paint from life and never paint anything I don’t enjoy.”

“I make it a rule never to paint except out of pleasure.”

Categories
Art theory Landscape Oil Painting Other Art Blogs I Read Outdoors/Landscape Painting Photos Plein Air

View from Viansa Winery

Oil on Canvas Panel, 12″x9″ (Larger)

On November 3 I went to Viansa Winery in Sonoma County with my plein air painting group. It’s a beautiful estate in the wine country with wonderful views in every direction. I painted the first layer of this painting on site and then today at home I painted another layer, correcting the original plein air sketch. I set my timer for one hour and completely redid the whole painting in about 45 minutes. Then I had dinner and when I came back I forgot my plan to do a one-hour painting and spent another two hours fiddling around with stuff I could have left alone.

As Karen suggested in her comment here a couple days ago, it’s good to focus on one goal per painting. I did that with this painting. My goal was to create a sense of distance, and I think I accomplished that. (Yay!) What’s interesting is that even though it’s only been three weeks since I started this painting, I see how much I’ve learned just in that short time…or maybe how much of what I’ve learned in the past year is starting to sink in and take hold. The on-site painting was out of proportion and very flat–no sense of depth or distance. But it was colorful which was my focus on that day — getting some color into my painting.

As I worked on this tonight I was thinking about two things my teacher recently pointed out to me that applied to the problems I’d had with this painting:

  1. Paint the dog before the fleas (in other words, get the big shapes in before starting on the little details)
  2. When you have man-made objects in a painting, such as buildings or fences, they have to be the right size or the whole painting will look wrong because we know what the object is and what it’s size is.

Here’s the photo I took of the scene:
View from Viansa Winery Photo
Larger

In the original version I got really involved in painting the little building in the front left and the bigger one halfway back on the right. But I’d made them bigger than they should have been so I could paint the details. And they were definitely the fleas, not the dog!

Categories
Art theory Landscape Oil Painting Other Art Blogs I Read Outdoors/Landscape Painting Photos Plein Air

Inspiration Point, Tilden Park

Inspiration Point, Tilden Park

Larger
Oil on panel, 9×12″

Sunday was my plein air oil painting class in Tilden Park and we met at Inspiration Point in Tilden Park in the Berkeley Hills. On a clear day you can see far into the distance from this site. Unfortunately, when we arrived at 9:00 a.m. the fog was so thick we could barely see halfway across the parking lot. Our teacher, Elio Camacho, had planned to start class by doing a demo — an expansive vista on a large canvas. To try to accomplish something until the fog cleared, he had us set up our easels facing the alleged view and get ready to paint. I enjoyed the idea of randomly picking a spot with no idea what I’d see or paint.

At 10:00, after delicious coffee and treats from Peets Coffee generously brought by a class member, Elio did an amazing small demo of the sun glaring through the fog above some nearby trees. Happily, just as he finished the fog lifted and we got to work.

This time I remembered to take a photo of the scene before I got started so that I could finish the painting at home:
Inspiration Point, Tilden - Photo

Categories
Art theory Oil Painting Other Art Blogs I Read Painting Photos Plein Air Sketchbook Pages

Treasure Island Marina, SF Bay, Plein Air

Treasure Island Marina, SF Bay
Oil on 9 x 12″ canvas board
Larger

My plein air group painted on Treasure Island this morning, a former military base and site of the 1939 World’s Fair in the San Francisco Bay. There were some amazing views of the SF skyline, the Bay Bridge, and Port of Oakland but it was very foggy and windy (as usual for the bay) when we arrived so I chose to paint in a more sheltered location in the marina.

Here’s the scene when I arrived:
IMG_1328

And here’s a quick snapshot I caught of the sailboat in the foreground as it glided past me:
IMG_1335

These are the sketches I did when I arrived, trying to decide on the view and focal point.
At first I was going to do the SF skyline but after sketching it realized it didn’t interest me; the shape of the dip along the skyline of trees on the hill did.
Treasure Island thumbnails

I did some things right on this painting, after taking to heart the good advice from my wonderful oil painting mentor Nel (whose wonderful Everyday Paintings deservedly sell Every Day — I own two), from Katherine Tyrell‘s post about plein air painting, and from the comments here on my last plein air attempt.

This time I didn’t chase the light (changing the painting every time the light changed). Instead, I noted when I started that the light wasn’t interesting–too foggy–but guessed it would probably clear up at some point. So I decided to block in the masses–the big shapes of the hills, sky and water and as soon as the sun came out I would then add the light effects, which worked fine. I also remembered that boats are flat on the bottom because the water line is flat and level. I also liked the the way I did the tree tops against the sky.

A couple things I didn’t quite get right: I forgot that everything looks darker and duller when you bring it indoors–it looked so pretty in the bright sun but is actually a little too dark. Also last time I swore I wouldn’t “fix” things in the studio, but I hadn’t had time to finish the boats so I worked on them, which was fine,. But then I “touched up” the hills and lost some of the glowing edges I had originally.

It might not be great art, but at least I didn’t feel like I had no idea what I was doing, as I had a month or two ago.

Advice, critique, comments are welcomed!

Categories
Art theory Oil Painting Painting People Photos Portrait Puerto Vallarta

Work in Progress: Puerto Vallarta Cowboy in oil

PV Cowboy - Oil painting layer 2

Oil painting IN PROGRESS – 22 x 28 inches
Click here to see larger

I started this oil painting today from a photo I took in Puerto Vallarta a few months ago (see bottom of this post for the original photo). I thought I’d track my process and progress and post the results as I go.

(Clicking on any of the pictures below will take you to Flickr where you can click All Sizes to see larger)

Original thumbnail sketches

Above are the thumbnail sketches (each about 2″ x 3″) that I did first, trying to work out the composition and colors. I needed to make the sketch match the dimensions of the canvas. Unlike watercolor paper that you can cut to any size, with canvas you either have to stretch it yourself (been there, done that) or use standard sizes.

Above top right: I used grey markers to work out the values but I didn’t change the composition from the photo. Above bottom left: In this grey marker sketch I moved the cowboy to the right, adding more wall between him and the door and added some white gel pen to put back light I lost. Above bottom right: I used gouache to work out the colors.

Enlarged photo with cowboy moved Drawing on colored acrylic ground

(Above left) I placed the original photo in InDesign so I could print it out in grey scale in”tiled” pieces and then I taped the printed sections together so that it would be the same size as my 22×228 canvas. Then I printed just the cowboy in color and stuck him where I wanted him on the large printout. I could have done this in Photoshop but decided it was quicker to do manually. It’s placed over the canvas in this photo.

(Above right) I toned the canvas with acrylic paint mixed to a sort of orangey-brown. I used a sponge brush and kind of messed it up, going over an area that was partially dry, which took off paint instead of putting it on. Fortunately it was in an area where there’s a textured wall so it didn’t matter. Then I put a sheet of Saral graphite “carbon paper” between my enlarged printout and the canvas and using a stylus originally designed for using on a Palm Pilot PDA, drew (invisibly) along the outline of the shapes on the enlarged photo. The Saral paper transfered those lines to the canvas. Unfortunately I didn’t notice the enlargement slipped so I had to retrace the guy again, half an inch to the left which left a lot of confusing double lines. The main reason I wanted to trace was to get the shapes on his face right and they were totally messed up. So I redrew him over the graphite lines with a fine point Sharpie instead of tracing, which worked OK.

Working from enlarged thumbnail sketch & photo

Above: I scanned my thumbnail value sketch, enlarged it to 8×10 and printed it out and stuck it on my easel along with the reference photo and then….

5-Monochrome acrylic underpainting

Above: Using black acrylic gesso I referred to my value sketch to make a grisaille or monochrome underpainting over the orange. Now that I’m looking at this I realized I forgot to put the grey rectangle behind his head that will have the text on it and the orange is looking paler than it really was.

6-Painting the face upside down

Above: I was having trouble with the face so I enlarged his face and printed it, then turned the canvas and the printout upside down and tried to get the shadows and value patterns right on his face.

Then I blocked in the first layer of color with oil paints over the underpainting (picture at top of post). Once it dries I’ll paint another layer. I plan to work loosely, avoiding overworking, especially the door on the left which I like just the way it is.

Below, the original photo. Isn’t he wonderfully macho?

Original photo

Categories
Landscape Oil Painting Other Art Blogs I Read Outdoors/Landscape Painting Photos

Pt. Reyes in Oil

Pt. Reyes-Oil-IMG_0993

Oil on canvas, 16 x 20″
Click here to see enlarged view

Yippee! I finally got back to oil painting and I think that everything I’ve learned in acrylic and gouache and from reading books on landscape and seeing other people’s instructional photos and videos on the web and especially the great advice I’ve gotten from other art bloggers finally clicked. I was actually able to capture just what I wanted to in this painting, which is a rare gift!

I just wish I could tell whether the images look right on the screen. I still haven’t quite gotten my monitor calibration dialed in. In the painting the distant hills and mountains look a little misty–like there’s lots of atmosphere/fog between them and the viewer, subduing the colors. The blue peeking through the clouds is ultramarine not cyan like it appears on my monitor. But this afternoon I wanted to paint, not futz around with computers. I did enough of that last weekend!

Here are the things I’ve learned about oil painting that I applied:

  • I limited my palette
  • toned the canvas with a wash of acrylic yellow ochre
  • painted the sky white and then blended in the blues
  • blocked in the darkest darks, the mid-value big shapes, and then did the next smaller shapes and then added details.
  • I made sure to wipe my brush if it picked up some of the wrong neighboring color before applying more paint
  • I didn’t let myself get lazy about mixing colors from whatever was left on the palette instead of adding the missing color in fresh paint
  • And I stopped before I overworked it and didn’t get hung up in details

And here are the people who I pestered for oil painting advice (which they generously gave me) that finally sunk in:

I did the painting from this photo I took on a hike in Pt. Reyes to the ocean. I painted it this afternoon in about four hours (including cleaning up), trying to pretend that I was painting plein air:

Pt. Reyes original photo

Categories
Photos Studio

My studio’s new ergonomic sit-stand desk

Sitting height

Finally I have my new Workrite Sierra electric sit-stand desk. This is it in lowered position for sitting in a chair. If you click on the picture above, it will take you to Flickr where I’ve annotated all the different items (just mouse over the little boxes and the descriptions appear). Flickr also has larger sizes of both photos.

Standing height

Here it is at standing height (I’m tall). It’s so great being able to alternate between sitting and standing–it saves my back and my feet!

On the left is my main drawing table that I’ve previously posted drawings and photos of before. On the right is a drawing table that students or painting group buddies use. To the right of that is my window seat and to the right of that is my easel. Maybe I’ll take 360 degree pictures of my studio (my favorite place in the world) and post those some day.

I love the new desk but it’s been a journey getting all the computer stuff set up, including calibrating the new LCD monitor so that the colors look the same on the screen and on the printed output. I had been using an old CRT monitor that was excellent quality but too huge and heavy to use with this table. I advertised it on Craigslist for free and a nice guy who also turned out to be an artist was happy to take it home with him.

There were a series of amusing mishaps and extreme computer geeking with my good buddy Richard, who worked with me until 1:30 a.m. on Friday to get it all set up. Some of it was pretty funny and I wanted to write about them but I’m too exhausted tonight. We’re going through our busiest month at work and between the studio being all kerblooey with all the computer stuff plus the demands at work, I haven’t been able to get much posted the past week. But soon I’ll be on my birthday vacation (either next week or the following week, depending on what’s needed at work) which will be devoted to sketching and painting. So don’t give up on me. I’ll be back with regular postings very soon!

Categories
Photos Studio Watercolor

In the studio & Wanna be tagged?

Studio - Work in Progress 2

A watercolor in progress (about 1/3 done) on my watercolor table with my helpers standing by, waiting to help (or get in the way). This is a commissioned portrait of a house with the family’s 3 cats in the window.

Studio - Work in Progress 1

An acrylic painting in progress on my easel in the opposite corner of the room.

If you click on the pictures to look at them on Flickr you’ll see little notes of what stuff is.

Tagged

Now, about this tagging business. This week I’ve been “tagged” by three different art bloggers. When you get tagged you’re supposed to list seven little known facts about yourself and then list seven blogs you like to visit and then tell each of those people they’ve been tagged. It’s sort of like a chain letter. Since I don’t know who’s already been tagged, and since I was tagged 3 times in 3 days, I have a feeling people are running out of people to tag…which makes me feel a little like I did in high school gym class where I was always the last to be picked for a team since I was such a klutz.

So instead of tagging other people, I’m going to invite people to be tagged. That way I won’t be imposing on anyone and won’t re-tag already tagged people. Will I get in trouble for breaking the chain? If you want to play and haven’t been tagged yet, just leave me a comment and I’ll toss you a tag…

Here are the 7 random facts about me:

1. I live in a house that used to be a duplex so I have 2 living/dining room rooms, 2 kitchens, 2 bedrooms, 2 bathrooms and 2 laundry rooms. (One living/dining room/kitchen is my studio and 1 laundry room is a pantry now.)

2. I have two cats who sleep on top of my computer monitor and tv with their tail hanging over the screen.

3. I love doing dishes and cleaning the cat litter box but dislike doing other housework because it takes too long.

4. I like to read manuals for computer software and electronic gadgets and I subscribe to PC Magazine.

5. I hate shopping for clothes but love shopping for art supplies and books.

6. I download books from Audible.com to my computer and iPod and listen to them while I watercolor (but oil or acrylic painting I listen to music).

7. I have a spinning bike (exercise bike) in my living room and I like to ride it while watching American Idol on my TiVo with the sound played through my stereo.

And here are links to the lovely artists who tagged me:

Claudia of Time Passages whose garden sketches are sensational!

Kerstin Klein of Snowflakes and Black Vampires who has been participating in the portrait party where people trade doing each other’s portraits.

Dinahmow (sounds like “Dynamo”) of Idle Thoughts of an Idle Woman  whose printmaking and photography is stunning.

So, I know I’ve done this all wrong. I haven’t listed 7 new tagged people…but I’m tossing the ball to you and calling out TAG, You’re IT.  If you wanna be tagged, just leave me a comment and I’ll link you in the next post.