Inspired by Casey’s success with the Carder Method and frustrated with my own slow progress at oil painting, I bought the Carder Method video and Color Checker tool. Below are step by step photos of my using the method to paint this still life, a brief review of the Carder Method and photos of my studio set up for working with it.
The Carder Method is designed to eliminate many of the problems that can make painting difficult. By creating an carefully lit, controlled environment, a painter can focus on learning to clearly see color and value differences while eliminating problems caused by variables such as changing light.
Click “Continue Reading” to see photos and read more….
After deconstructing one artichoke to paint in watercolor (previous post) I decided they were too old and worn out to bother cooking them, so why not paint them instead. I’m finding how important it is to take breaks when I’m painting. Each time I took one (because someone came to the door, I had to go to sleep or have lunch) I was surprised at seeing the painting with fresh eyes. It gave me a chance to strategize, stop futzing around in one area that wasn’t working and just needed to be scraped off and started over, notice that the values needed strengthening, etc.
At a certain point I recognized that this is as good as I can do for now. I’ll learn a little more and be able to a better on the next piece. That is so much more satisfying than trying to bring the piece to the level of the bar I keep raising or trying to make it as good as the painting of other artists’ work I admire. As a good friend said to me yesterday, “Compare…and despair!” and he was so right. Another friend pointed me to this from Desiderata:
If you compare yourself with others,
you may become vain or bitter,
for always there will be greater and lesser persons than yourself.
Artichokes, easel & palette in the studio
The multi-colored card on my easel is a Gretagmacbeth ColorChecker that I use when I photograph art work. Sometimes I use the white square to set my cameras “white balance. I always include some or all of the card when I take the photograph so I can compare the colors on the card to the colors on my monitor to see if I’ve got it right.
With the card included in the photo, I can correct the colors in the photo using the Levels tool in Photoshop:
Select the “white” eyedropper in the Levels menu and click it on the white square. This sets the white level so that white in the photo is pure white, not greyish. Sometimes this is all that’s needed.
If the black square doesn’t look black enough, I do the same with the black eyedropper in the black square. Setting this range of black to white really helps, especially when there is no black or white in the painting.
To remove a color cast (e.g. when the gray square looks greenish pinkish) I use the grey eyedropper on various spots on any of the gray squares until the color cast is gone and gray is gray.
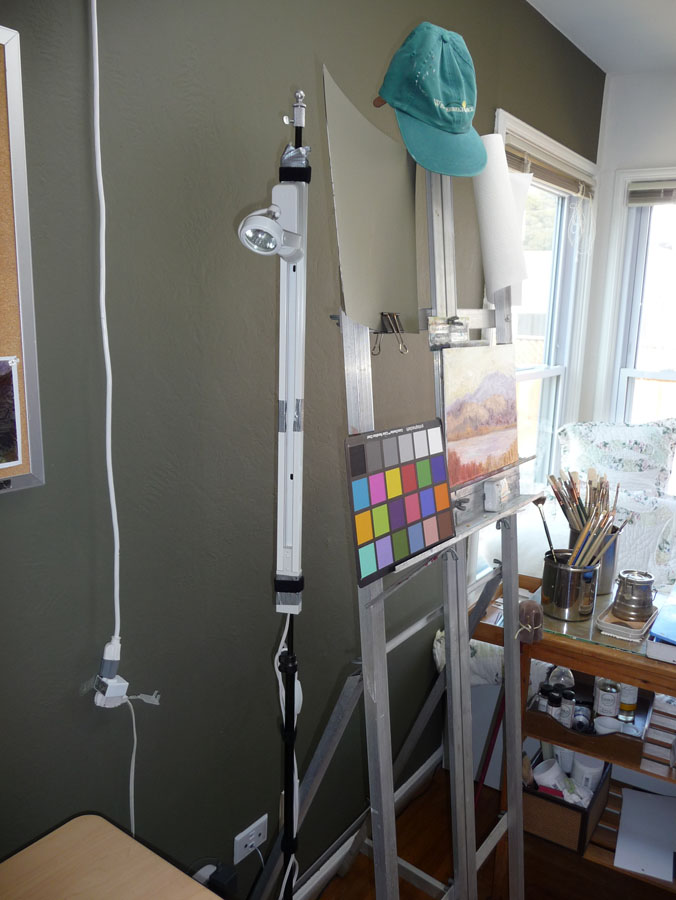
I’ve made some improvements to lighting and comfort in my studio and wanted to share what I’ve learned in the process. In the picture below you can see some of the changes from my previous post about reorganizing the studio. These include the floor mat, the wall paint, and a still-life lighting setup.
This post could also be called, “What I Bought Myself for My Birthday” as these goodies were all birthday presents to myself. (Click the images to enlarge.)
Studio with new cushy floor mat, lighting and dark painted wall
FLOOR MAT
The floor mat pictured above makes a huge difference in comfort. I got the idea at my hairdressers when I wondered how she stands all day. She pointed out her floor mat and when I felt how cushy it was, I had to get one. I work standing at a computer or at the easel much of the time. Without a cushion my feet tend to hurt by the end of the day. I tend to sit until my back hurts and then stand until my feet hurt and then switch agin. The mat makes it comfortable to stand comfortably for much longer.
WALL PAINT
I painted the wall behind my easel and desk Benjamin Moore “1490 Country Life” using their new Aura line of which is nearly odor free and covers in one coat. I’d noticed studio walls painted this color in many of the painting videos I’ve watched. Finally one of the artists actually specified that this 1490 color was especially popular with portrait artists for their studios because of how the color sets off skin.
But it also reduces the glare off of the previously white wall I was getting from my overhead light and helps to cut unwanted bounced light and the resulting double shadows on a still life that I’m lighting with a strong directional light (more about that in a minute).
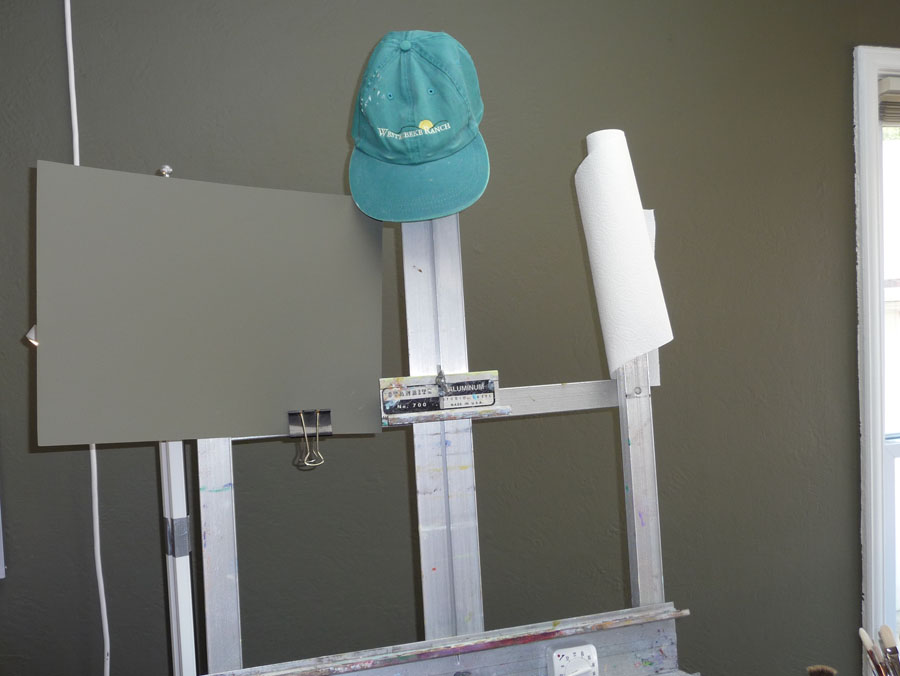
I still have to wear the hat you see hanging on the ease—the overhead fixture does a beautiful job of lighting a canvas without reflection, but with a relatively low ceiling it’s pretty bright on the eyes.
STORAGE
Below is the wonderful canvas and supply rack that my next door neighbor built for me.
Canvas storage rack in closet
It can be free standing but was built to fit inside this closet. The four sections on the far left hold already painted panels and for now, the rest hold panels and canvases ready to paint. The structure is seriously overbuilt due to a slight miscommunication. We speak in a combination of English (my native language) and Spanish (his) and sometimes we think we understand each other but don’t. It’s so sturdy it may even hold up the house in the case of an earthquake.
To the right of the structure is still a bit of closet hanging space where I hang my painting smock and my plein air painting outfit, a very lightweight, ventilated, long sleeved, sunproof shirt so I don’t need sunscreen and lightweight pants that are also sunproof that turn into shorts when you unzip and remove the legs.
The top shelf of the structure (below) provides a place to put my other plein air gear: my Soltek easel, my brushes in a canvas brush carrier, and two canvas carriers from RayMar Art, the company from which I also buy my painting panels (they are archival, don’t warp and are less expensive than most of this quality).
Shelf for easel and other plein air equipment
LIGHTING
Below is the setup for lighting still life that I’m finally satisfied with, after trying numerous other lightbulbs, fixtures, and other accessories. I wanted a way to get a strong directional light on the still life so there was good contrast in values, modeling of the shape and structure of the object(s), a strong shadow shape without double or triple shadows caused by interference from other lights, and a light color/temperature that gives the illusion of sunlight. A tall order indeed!
Still life lighting set up
As you can see above this system creates a nice swath of directional light, with a strong single shadow (though the photo doesn’t do it justice–it’s hard to photograph lighting!). Below is another picture of how I have it set up.
I went to a local lighting store and we tried out all sorts of things. It took them awhile to understand that I wasn’t buying lighting to light a painting, but to light a still life I was going to paint. They recommended a short section of halogen tracklighting with a narrow-beam floodlight halogen bulb. They added a cord and switch for me since I was going to keep it nearby rather than permanently install it on the ceiling. Then I attached the track light to a cheap old lighting stand I had from photography days.
Track light attached to light stand
The ugly cord and switch on the left above is an inelegant solution that allowed me to avoid having to have an electrician wire the overhead light. It just plugs in and switches on and off. Too bad the cord isn’t the right length.
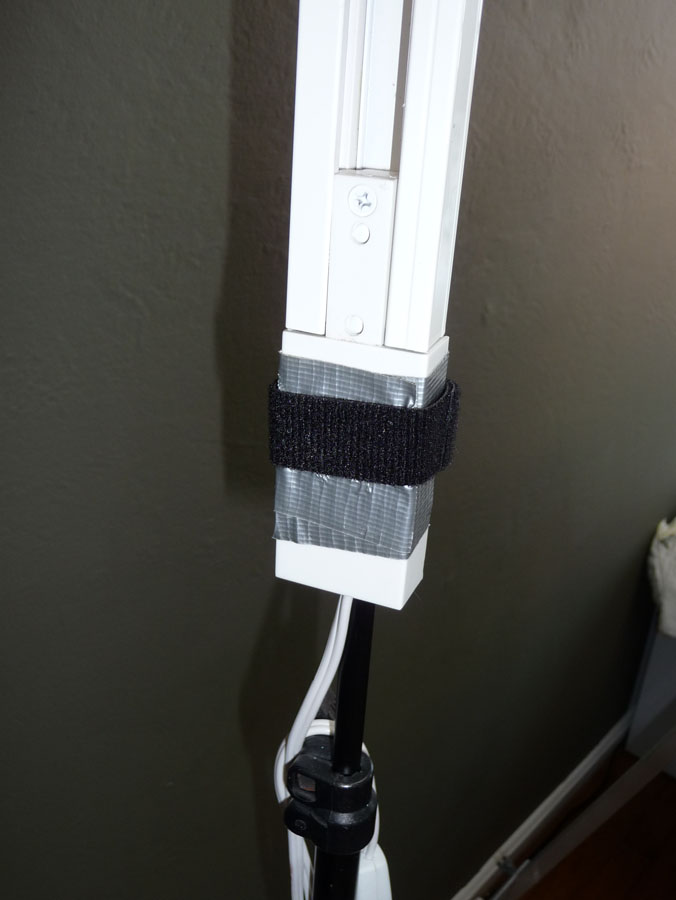
On the two pics below you can see how I used duct tape and a strip of velcro 2-sided strapping to attach the track light to the stand.
Track light with halogen spot attached to old light standDuct tape/velcro attachment
Below is the lighbulb we found that works perfectly for this application: Sylvania Tru-Aim Brilliant Halogen (50MR16/B/NFL25) which I think means it’s a 50 watt narrow-beam flood light.
Lightbulb box for track light
SInce the light was so bright I made this cardboard shield and painted it the same color as the wall and clipped it on to the easel so I could study the still life without also looking at the light. I’m sure there’s a more elegant solution, but this works. The paper towels sit on a funky paintbrush which is stuck into a slot at the top of the easel.
Cardboard painted with wall paint to shade light, paper towel "holder"
My WorkRite electric desk, which holds my computer and monitor not only allows me to work sitting or standing but I discovered that I can use the end of the table by the easel to place a still life at whatever height I like. I can also display a photo on the monitor and scoot the monitor closer to the easel to work from.
Set up for still life with electric desk
I can hang different colored cloths as still life backdrops from the bulletin board with pushpins and I like having artwork on it that inspire me.
The painting to the left isn’t usually there. I hung it when a gallery owner came over for a studio visit because she was interested in including it in an upcoming show (it will be there next month — more about that later).
Another view
I should also say that I have no financial or other interest in any of the companies or products I mentioned in this post. I just like them.
Welcome to my newly reorganized studio. Would you like a cup of tea or coffee? My sister Marcy Voyevod, an interior designer with an amazing sense of spatial relations, came over last Wednesday night to give me some suggestions on how to rearrange things in my studio. I’d told her I wanted to move my easel so that it wasn’t in front of a window. I also wanted to be able to see my computer monitor from my easel so that if I was going to paint from a photo (or finish a plein air painting at home from a photo as I’m doing here) I could work from a more life-life image than a printed photo. As you can see from the above photo, we did it!
I was amazed when she started actually moving furniture around and coming up with one brainstorm after another. She advised me to clean out a closet in the next room (where I was storing random stuff and old clothes I don’t wear but was mostly used my by my cat for quiet napping during the day) and use that closet for all the canvases that were stacking up in the studio. Of course closet cleaning lead to the two of us trying on old clothes, deciding what she’d take and what would get donated, and lots of laughs.
Now the studio feels spacious again (without the extra furniture and clutter) and everything is organized and tidy. Click “Continue Reading” below to see more…