Categories
Art Flower Art Glass Oil Painting Painting Rose Still Life

Roses with Blue Cloth

Roses with Blue Cloth," oil on Arches Oil paper, 12x9"
Roses with Blue Cloth,” oil on Arches Oil paper, 12×9″

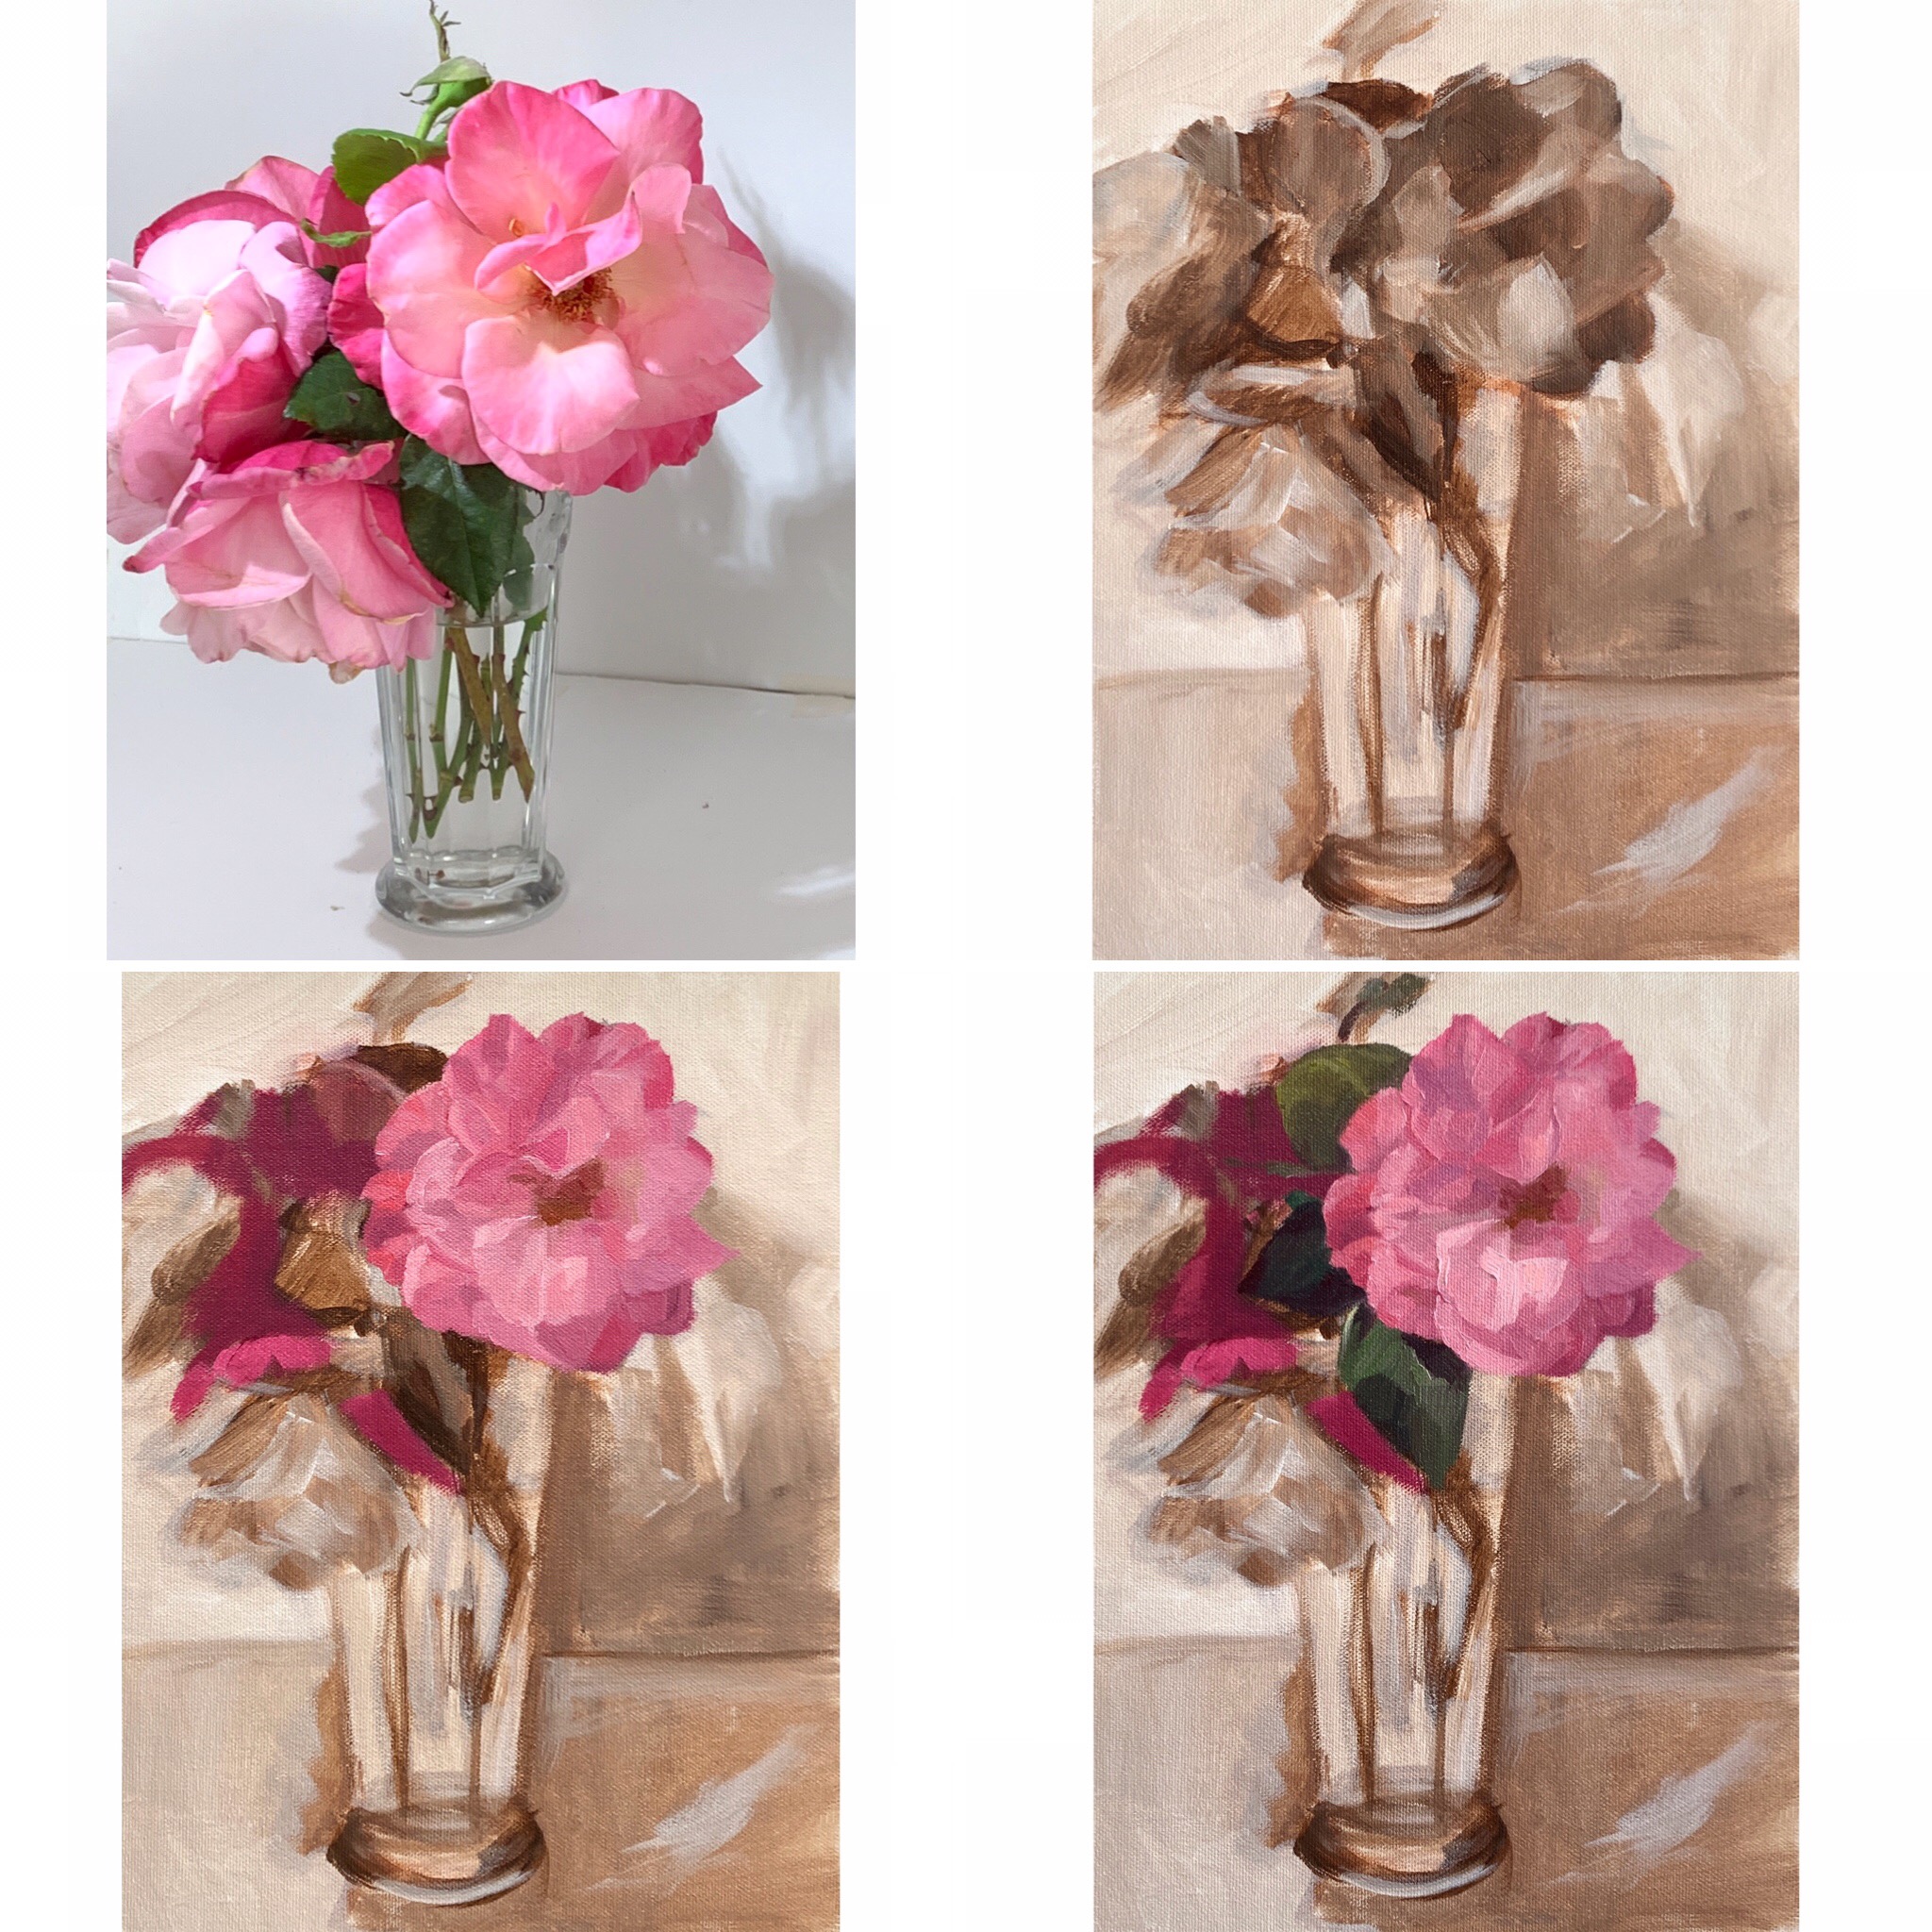
I made a good start with the drawing and getting the first rose blocked in on my first painting day but sadly, overnight the roses completely changed color and shape, as you can see in the reference photos below.

Clockwise from top left: Photo of roses day 1, Photo of same roses day 2, finished painting, WIP day one with setup.

I had to finish the painting using the reference photo and rediscovered how much fun it can be working from close-up enlarged photos of flowers and glass, looking for all the little nuances and details.

Clockwise from top left: Reference photo, WIP: initial drawing and block-in, second rose added, leaves added.

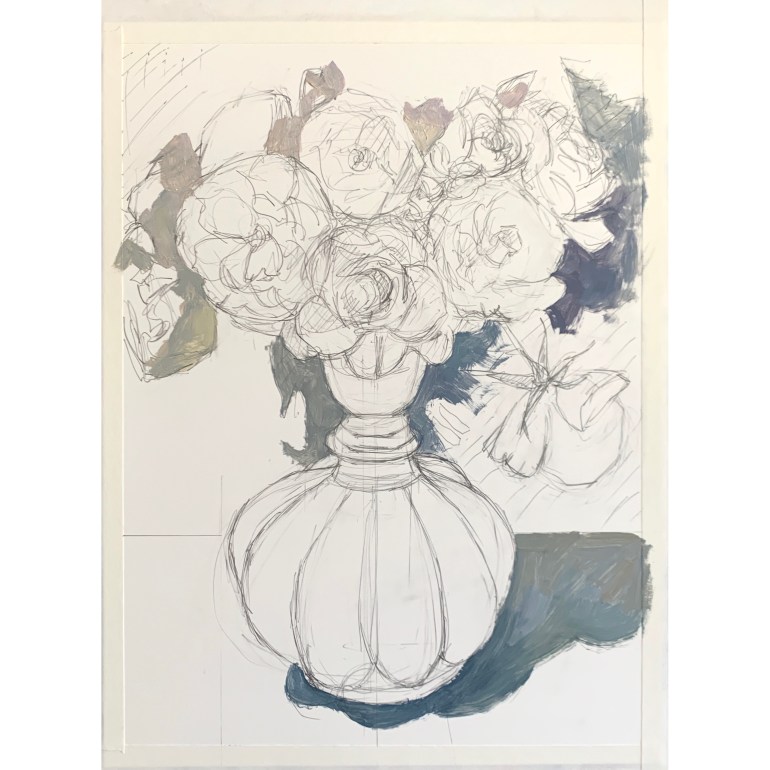
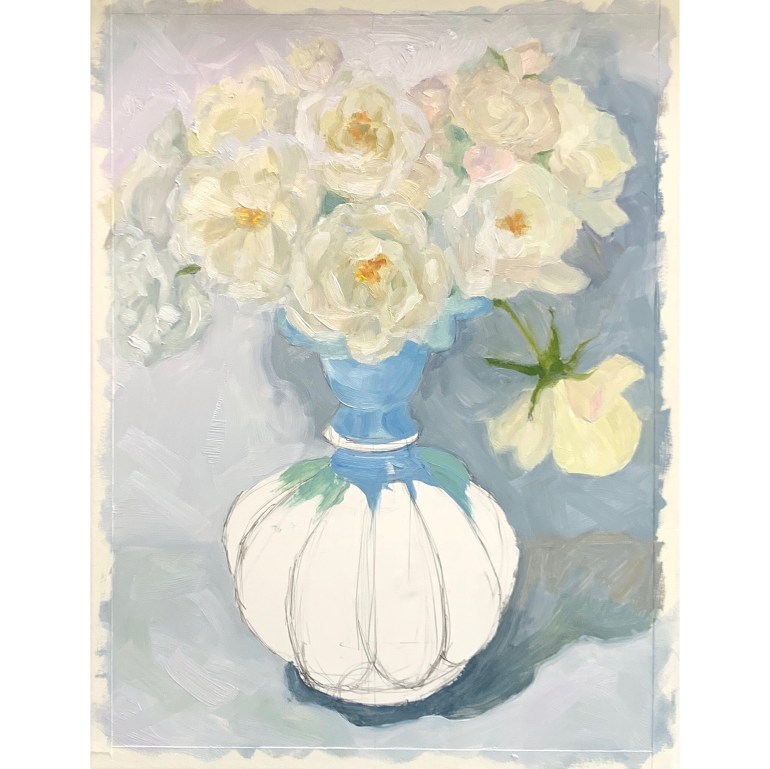
I chose the background cloth rather spontaneously. While it appealed to me on the day I set up the still life, I began to regret how intense the color was. I experimented with changing it, but decided it would be better to just finish this painting and make another painting than to try to reinvent the background colors and keep messing with this one.

Working on the background and vases, retouching the flowers

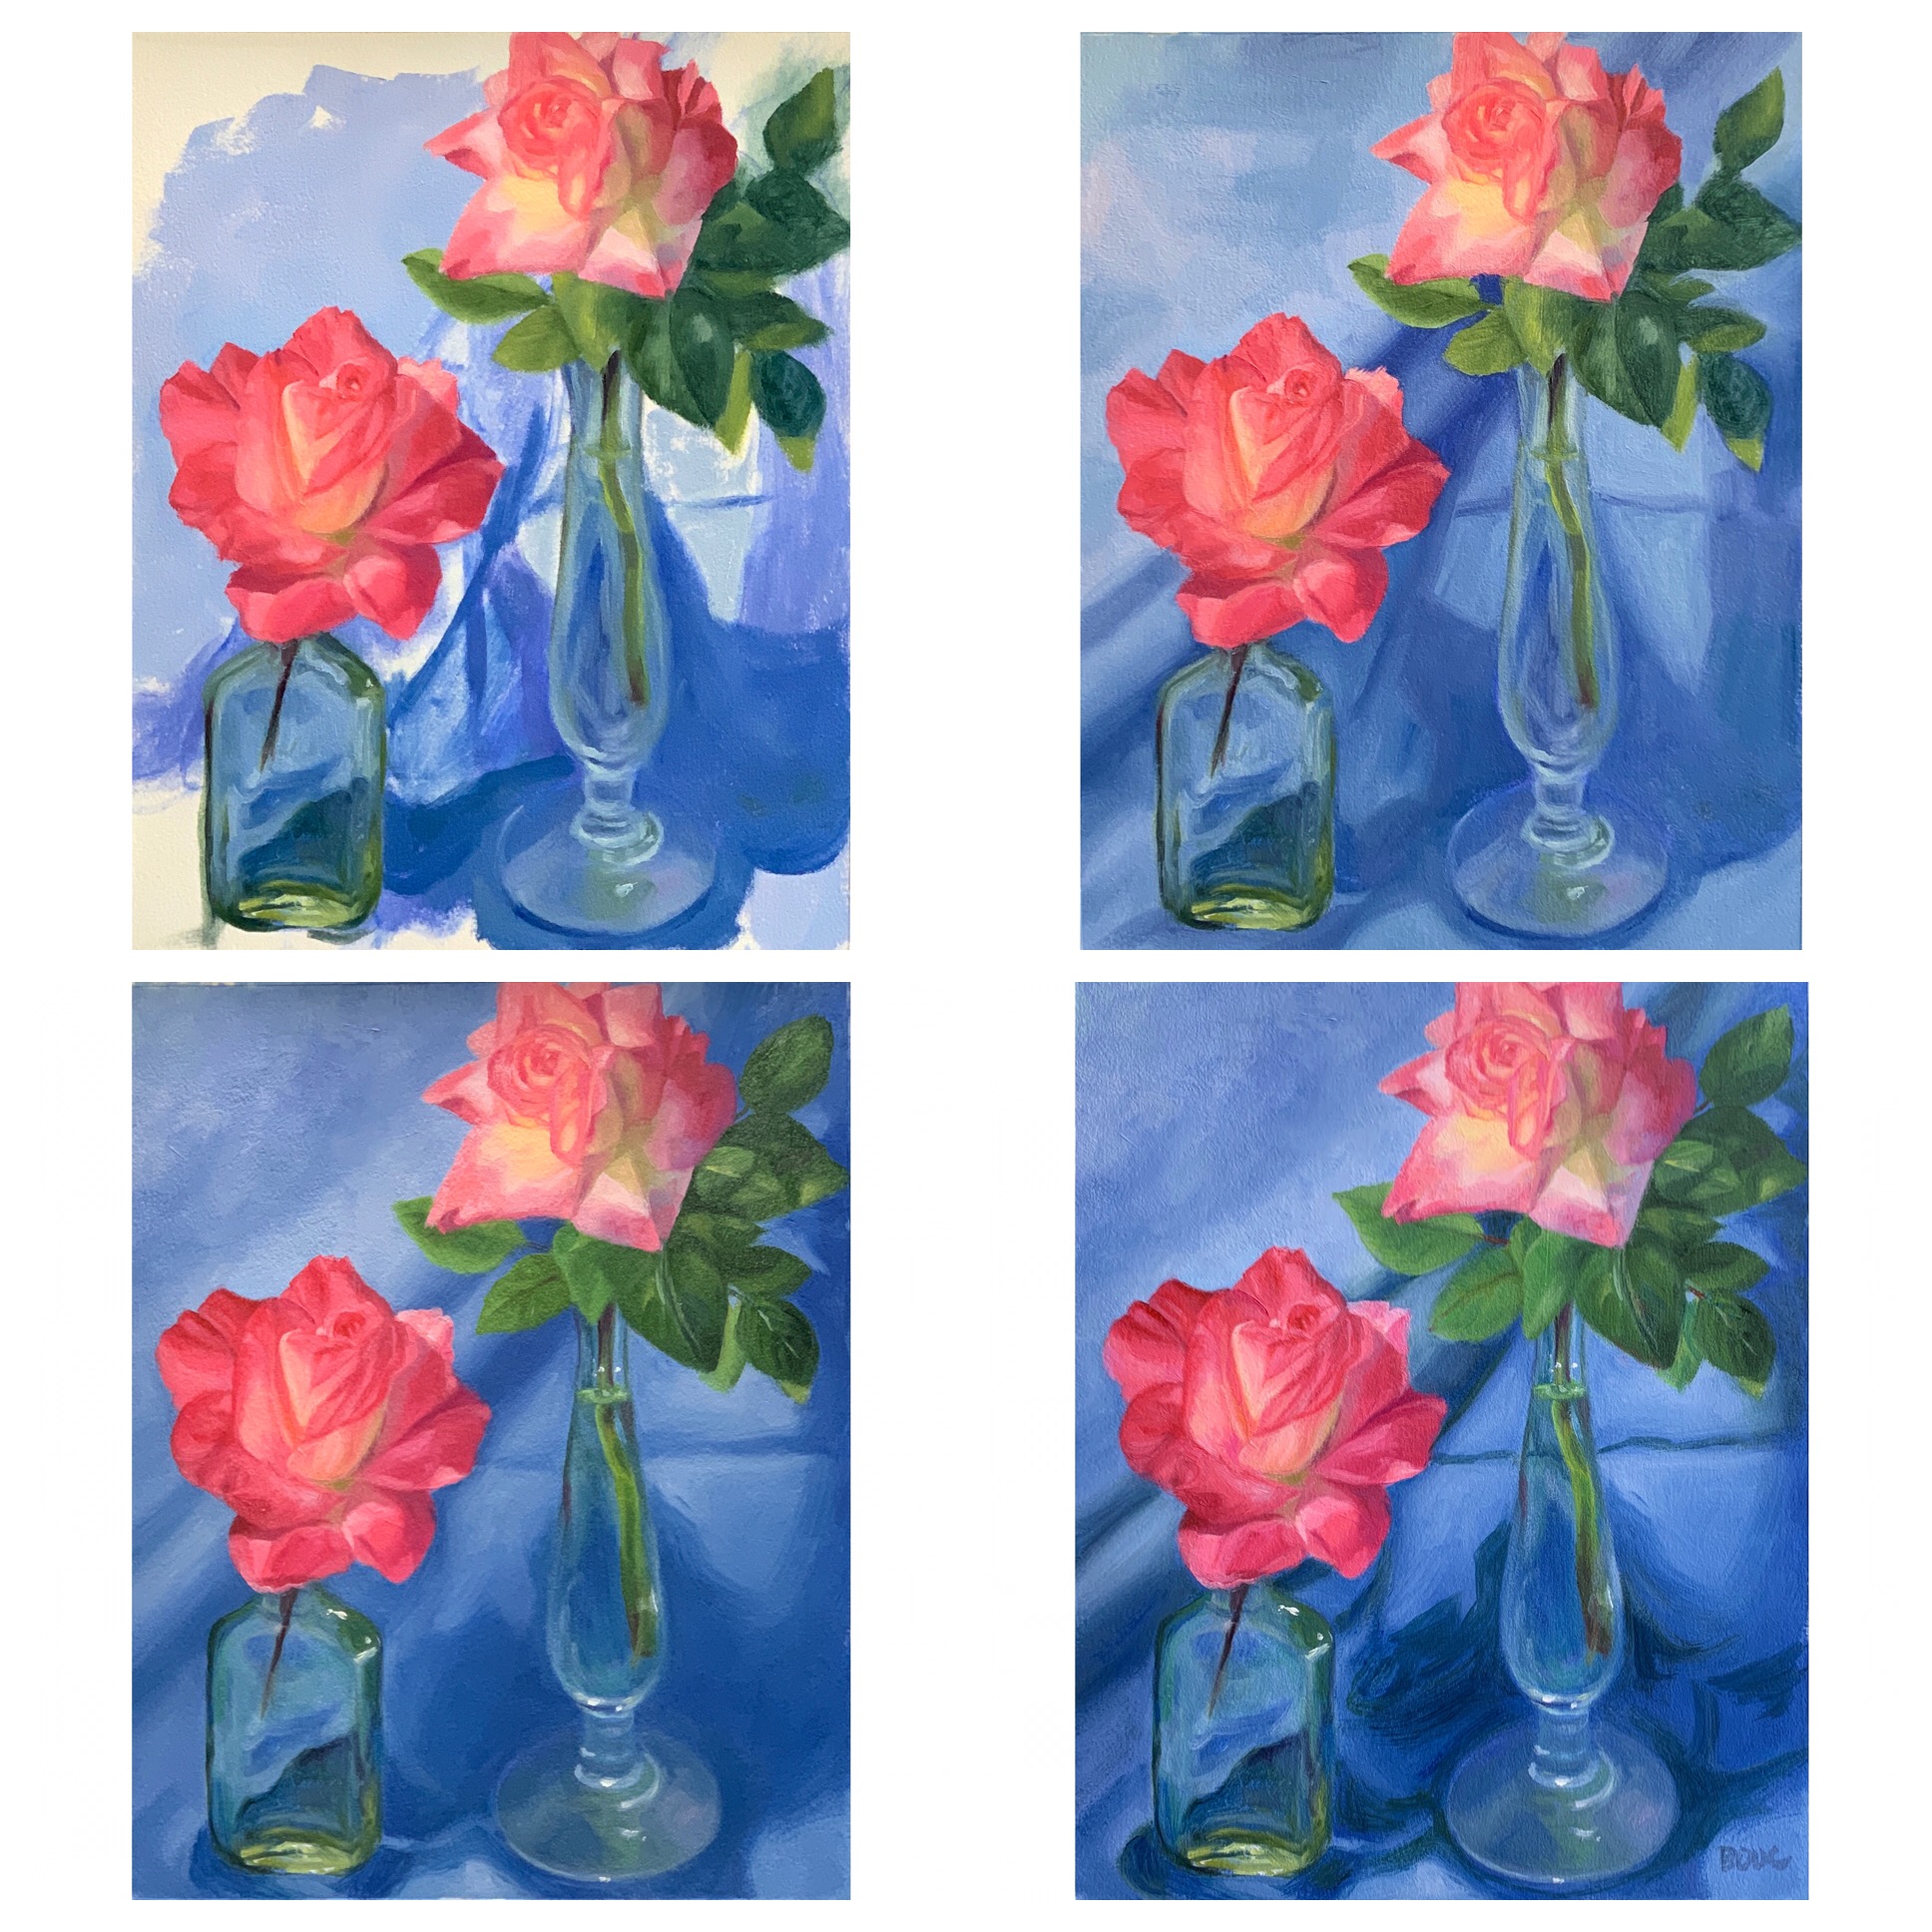
Perhaps for my next flower painting I will paint one as a portrait, enlarged, close-up as if I was painting a head and shoulders of a person (like the portrait I’m working on right now). 

Categories
Art Flower Art Oil Painting Rose Still Life

Mr. Grumpy’s Cheery Roses

“Mr. Grumpy’s Cheery Roses”, painted from life, finished from photo after flowers died, oil on canvas, 12x9”
“Mr. Grumpy’s Cheery Roses”, painted from life, finished from photo after flowers died, oil on canvas, 12×9”

After taking cuttings from my neighbor’s yard (with permission this time) I painted these from life but had to finish them from a photo after the flowers died. I experimented with starting with an acrylic underpainting but I’m so unskilled with acrylics that it didn’t really create a useful value-study underpainting as you can see below.

Clockwise from top left: Photo of flowers when I started, acrylic underpainting, getting started with my focal rose, then some darks and leaves

I’m still trying to find my way with roses. I’m quite attracted by simplified, more abstract ways of painting flowers, but my own tendencies towards detail always seems to override my intentions. Maybe if I painted really large, I could put in all the details, turning them into abstract shapes? Hmmmm….. 

Flowers and leaves blocked in, background and glass and stems added, darks and lights restated, final.
Categories
Art Flower Art Glass Oil Painting Rose Still Life

White Roses, Grandma’s Vase (and a Great Little Still Life Lamp)

White Roses: Spring Rose Series #7” Oil on Yupo, 12x9”
White Roses: Spring Rose Series #7” Oil on Yupo, 12×9”

I was happy that I met my two goals for this painting: 1) to keep it light and airy and 2) to draw and paint the flowers quickly before they changed or died.

I did the drawing on the first afternoon; painted the flowers and the background and began the vase on the second afternoon. I completed the rest of the painting the next morning, knowing it was my last chance before I’d be out of the studio for a few days. You can see the steps in the process photos below.

When I returned three days later the flowers were quite dead. Although I had a reference photo I could have used to “touch up” a few things, I felt that I’d said what I had to say and for once was willing to let it be as is instead of endlessly trying to perfect things.

Set up with clamp on LED 3-color lamp

One thing that made the painting really enjoyable was the discovery of this inexpensive and wonderful little clamp-on LED light that can be set to provide warm light, cool light or medium temperature light. It provided a perfect amount of directional light for lighting a still life and was easy to clamp on to my foam-core still life shadow box. The side of the box wasn’t quite tall enough so I just clamped on another piece of foam core and attached it to that. Since the light doesn’t weigh much it didn’t need anything more sturdy. No more clutter from a standing lamp or glare in my eyes from big heavy clamp on lights.