
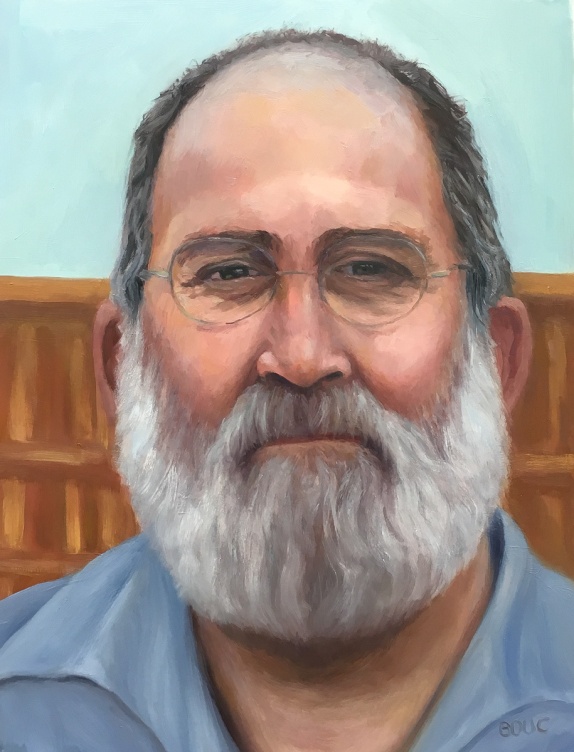
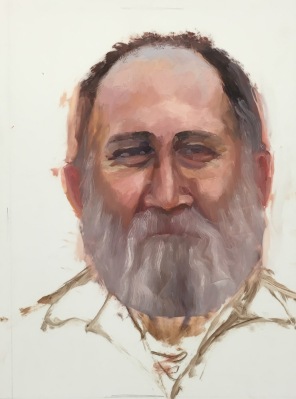
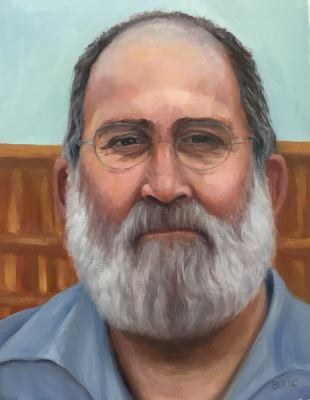
When Jeff the Handyman (who does excellent carpentry and electrical work) came over to look at a job, he was kind enough to let me take his photo for the series I’m painting of people at work in my neighborhood. I tried three times, before and after I started studying head structure and anatomy. With the third study (above) I felt like I’d said what I had to say, with the skills I have at this point, and was ready to move on.
Above is the final study and immediately below are all three attempts in chronological order.
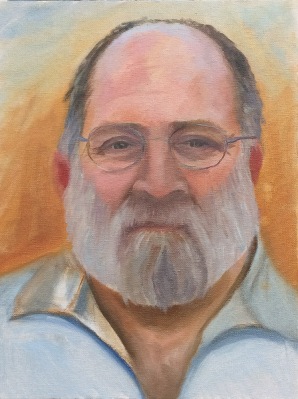


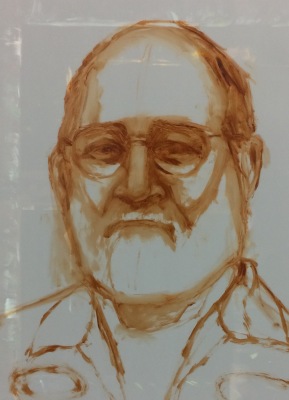
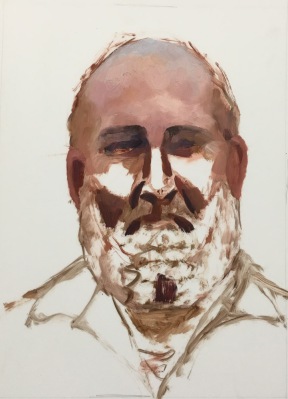
My favorite part of all three above is the sky reflecting on the top of his head. With each attempt my drawing improved a bit. The more I learn, the more I see, and the more I see, the more I know I need to learn!!!. Below are all three studies with work in progress (WIP) steps. I’m not offering the WIP to show how it “should” be done; just the approach I was experimenting with. I am always trying on techniques of other artists I admire but haven’t yet found the approach that “just works” for me.


15 replies on “Jeff the Handyman (and inspiring model)”
Very nice, well done! but “E” did get his beard much closer to the photograph. Perhaps his face widens out from the top of his beard down, underneath the whiskers. You are so good to ask for critiques! I just worked on something and wiped the whole thing off. Love your inspiration to keep on improving!! C-Marie
LikeLike
Since I’m working on mylar (DuraLar) and it’s much cheaper than canvas or panels I just stop where I am and start another rather than wiping off. That gives me a chance to see my progress and feels like I’ve accomplished more when there are 3 paintings rather than 1 painting wiped and repainted 3 times.
LikeLike
This was such an encouraging blog! Seeing how the many studies led to the amazing final portrait gave me an emphatic message not to give up. My hubby has a similar white beard, glasses and bald head – Guess who is going to be my next model . . . LOL.
LikeLike
Be sure to get him out in the sun under the sky to pose for you. It’s so fun to paint the sky reflection on the bald head! Send me a photo when you’ve done it. I’d love to see!
LikeLike
Jana
Wow… look at me. very nice job. I am flattered that you thought worthy of painting. thank you.
Jeff Rogers
Jr’s Handyman Service
LikeLike
So glad you like it. The comments I’ve been getting here and on Facebook and by phone have emphasized how competent, trustworthy, strong and kind you look. I’m glad I was able to portray those qualities which absolutely belong in your portrait.
LikeLike
Awesome
LikeLike
so cool to see the process! and that beard is divine!!
LikeLike
Thanks. It was fun to paint and to try to make it look like it had form and shape, not just hair.
LikeLike
I love seeing your progress!! I am frustrated not to get liknesses in the portraits I try, but maybe I need to make more paintings of the same subject….you are always so good in sharing your knowledge. Can you give me ideas of what has helped you most get a likeness….oh, and I love the sky reflection on his head that you pointed out! It just makes that painting!!!
LikeLike
Thanks Carol. What has helped me the most is the video classes I’ve been watching on the construction and anatomy of the head and features on New Masters Academy plus the books I’m studying. The truth I’ve realized about likeness is that everybody’s face has the basic same dimensions (e.g. eyes are halfway between the top of head and chin if viewed straight on and are one eye apart; ears and nose are in the same third of the face, again if viewed straight on, not tilted, in which case ears move up and down in relation to nose, etc.). What makes the difference between your face and mine is very minor differences in where features are placed, sometimes just putting eyes a few millimeters too high or too close, or nose too long or too far from lips, or eyes not deep set or too deep set….any landmark that is off by a tiny bit means the likeness isn’t there. So learning all the standard measurements for where features fall on average and how to draw the basic head shape before adding features gives a big advantage in the initial stage. Then it’s a matter of seeing how the particular person is different from the standard and getting that right in the drawing in the beginning–that’s the biggest help to me. But I still don’t know or see all of the above well enough yet to recognize where I’ve gone wrong right away.
LikeLike
Really good – the beard is lovely – and the reflected light!
LikeLike
Thank you! The beard was fun to paint.
LikeLike
These are great. It’s fascinating to see and read about your process &; progress!!
LikeLike
Thanks Nickie! I’m so happy to be making progress.
LikeLike