This post could also be called, “What I Bought Myself for My Birthday” as these goodies were all birthday presents to myself. (Click the images to enlarge.)

FLOOR MAT
The floor mat pictured above makes a huge difference in comfort. I got the idea at my hairdressers when I wondered how she stands all day. She pointed out her floor mat and when I felt how cushy it was, I had to get one. I work standing at a computer or at the easel much of the time. Without a cushion my feet tend to hurt by the end of the day. I tend to sit until my back hurts and then stand until my feet hurt and then switch agin. The mat makes it comfortable to stand comfortably for much longer.
WALL PAINT
I painted the wall behind my easel and desk Benjamin Moore “1490 Country Life” using their new Aura line of which is nearly odor free and covers in one coat. I’d noticed studio walls painted this color in many of the painting videos I’ve watched. Finally one of the artists actually specified that this 1490 color was especially popular with portrait artists for their studios because of how the color sets off skin.
But it also reduces the glare off of the previously white wall I was getting from my overhead light and helps to cut unwanted bounced light and the resulting double shadows on a still life that I’m lighting with a strong directional light (more about that in a minute).
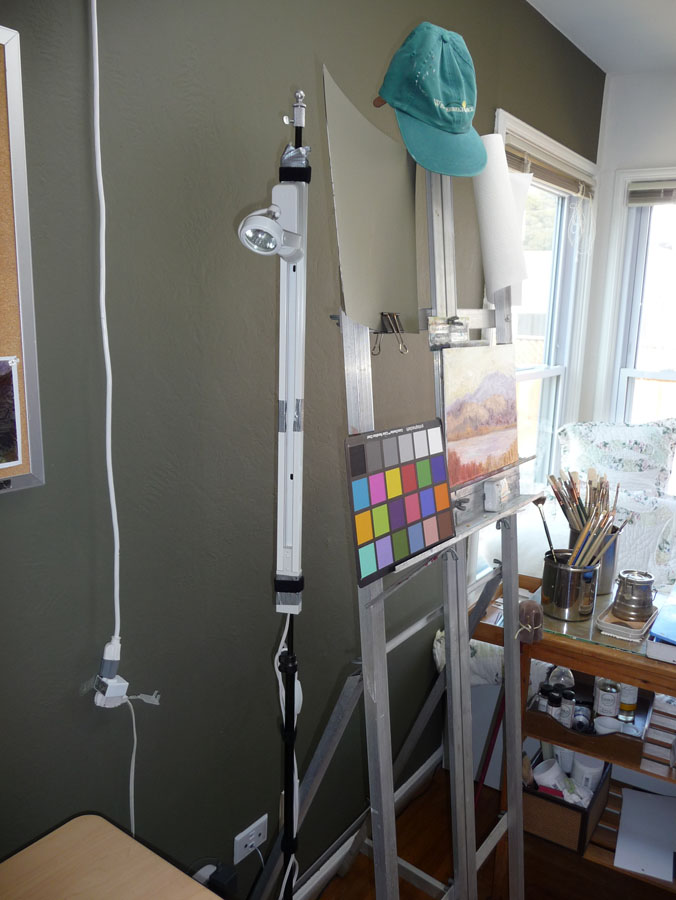
I still have to wear the hat you see hanging on the ease—the overhead fixture does a beautiful job of lighting a canvas without reflection, but with a relatively low ceiling it’s pretty bright on the eyes.
STORAGE
Below is the wonderful canvas and supply rack that my next door neighbor built for me.

It can be free standing but was built to fit inside this closet. The four sections on the far left hold already painted panels and for now, the rest hold panels and canvases ready to paint. The structure is seriously overbuilt due to a slight miscommunication. We speak in a combination of English (my native language) and Spanish (his) and sometimes we think we understand each other but don’t. It’s so sturdy it may even hold up the house in the case of an earthquake.
To the right of the structure is still a bit of closet hanging space where I hang my painting smock and my plein air painting outfit, a very lightweight, ventilated, long sleeved, sunproof shirt so I don’t need sunscreen and lightweight pants that are also sunproof that turn into shorts when you unzip and remove the legs.
The top shelf of the structure (below) provides a place to put my other plein air gear: my Soltek easel, my brushes in a canvas brush carrier, and two canvas carriers from RayMar Art, the company from which I also buy my painting panels (they are archival, don’t warp and are less expensive than most of this quality).

LIGHTING
Below is the setup for lighting still life that I’m finally satisfied with, after trying numerous other lightbulbs, fixtures, and other accessories. I wanted a way to get a strong directional light on the still life so there was good contrast in values, modeling of the shape and structure of the object(s), a strong shadow shape without double or triple shadows caused by interference from other lights, and a light color/temperature that gives the illusion of sunlight. A tall order indeed!

As you can see above this system creates a nice swath of directional light, with a strong single shadow (though the photo doesn’t do it justice–it’s hard to photograph lighting!). Below is another picture of how I have it set up.
I went to a local lighting store and we tried out all sorts of things. It took them awhile to understand that I wasn’t buying lighting to light a painting, but to light a still life I was going to paint. They recommended a short section of halogen tracklighting with a narrow-beam floodlight halogen bulb. They added a cord and switch for me since I was going to keep it nearby rather than permanently install it on the ceiling. Then I attached the track light to a cheap old lighting stand I had from photography days.
The ugly cord and switch on the left above is an inelegant solution that allowed me to avoid having to have an electrician wire the overhead light. It just plugs in and switches on and off. Too bad the cord isn’t the right length.
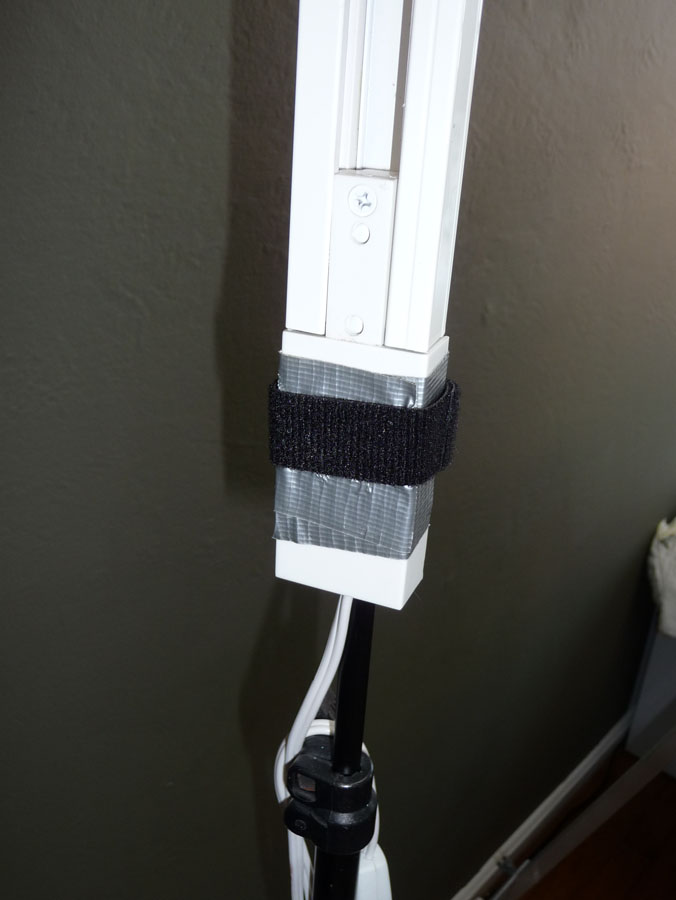
On the two pics below you can see how I used duct tape and a strip of velcro 2-sided strapping to attach the track light to the stand.

Below is the lighbulb we found that works perfectly for this application: Sylvania Tru-Aim Brilliant Halogen (50MR16/B/NFL25) which I think means it’s a 50 watt narrow-beam flood light.

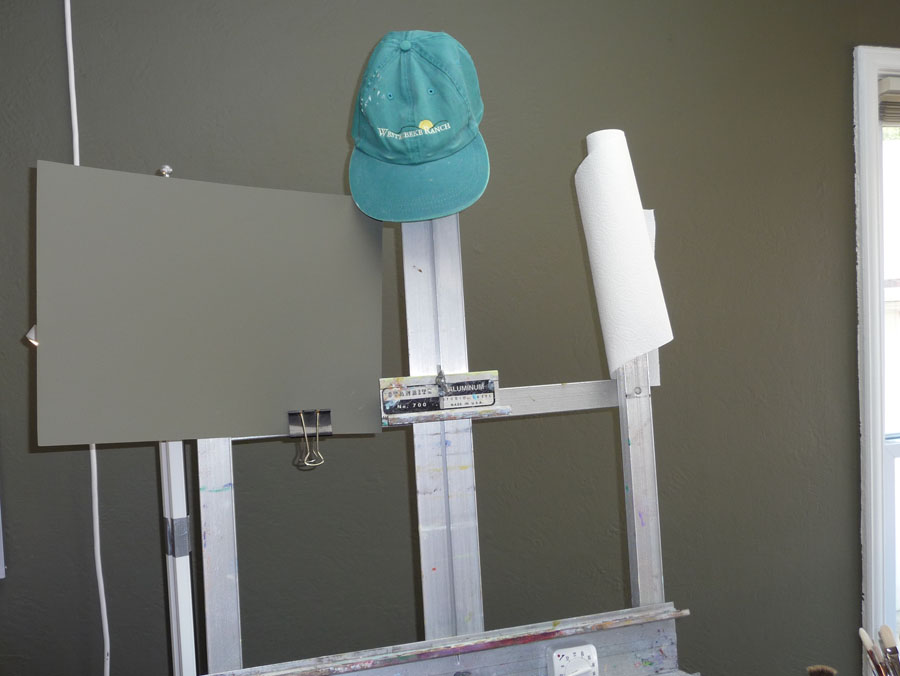
SInce the light was so bright I made this cardboard shield and painted it the same color as the wall and clipped it on to the easel so I could study the still life without also looking at the light. I’m sure there’s a more elegant solution, but this works. The paper towels sit on a funky paintbrush which is stuck into a slot at the top of the easel.
My WorkRite electric desk, which holds my computer and monitor not only allows me to work sitting or standing but I discovered that I can use the end of the table by the easel to place a still life at whatever height I like. I can also display a photo on the monitor and scoot the monitor closer to the easel to work from.

I can hang different colored cloths as still life backdrops from the bulletin board with pushpins and I like having artwork on it that inspire me.
The painting to the left isn’t usually there. I hung it when a gallery owner came over for a studio visit because she was interested in including it in an upcoming show (it will be there next month — more about that later).

I should also say that I have no financial or other interest in any of the companies or products I mentioned in this post. I just like them.

12 replies on “Light and Comfort in the Studio (& How to Light a Still Life)-”
Wow, So much wonderful information and you are so clever to work out all the kinks – thanks for sharing!!
LikeLike
This is grand! Thanks so much for sharing. I am looking forward to the day I have a two bedroom apartment with more room. Would be nice to have two baths, (you know how that goes!).
I am not going to move from my Ocean though. I am content now where I am. Your Studio is gorgeous. Has given me much to think about.
It has been much harder than I ever imagined to come back.
Being able to “Work at Home” has been a boon to my Spirit.
Thanks for adding to my Spirit.
A Beautiful great Birthday gift. I am so glad you were able to treat yourself. On the lights, maybe one day You will have a Chico. The electrician on Devine Design.
(((Circle of Hugs)))
Sherrie Roberts
LikeLike
I really enjoyed reading your entire blog on your studio. You can tell how much thought and energy that you put into this project (happy birthday! a great present). I particularly liked learning about the light source that you used. Thank you for making this public to all that view your blog.
LikeLike
great studio for a great artist -how nice for you to have seperate places for different mediums –
LikeLike
Wow, I want to come and paint at YOUR house! Happy Birthday month to you! Good ideas and great information.
LikeLike
Well, I said I hoped you’d enjoy your birthday and you did!
These process shots may be just the kick-in-the-butt I need to tidy this muddle. (Unless you do house calls?)
Thanks for all your tips and innovations.
LikeLike
I think that birthday presents to yourself are always THE BEST! You always get what you want! 😉
Great post Jana – I’ll be listing it on my blog post tomorrow.
LikeLike
Floor mat! brilliant. I want one. And thanks for the details on the paint color. I think I may be painting my studio wall the same.
LikeLike
I always am amazed how light has such an influence on color. Therefor I fid it critical to test the color on foam board and move it around my room in different lights. Has anyone used myperfectcolor.com yet? the have every color to test and they make it lighter or darker if your lighting is affecting the color hue.
LikeLike
Hi Jana,
I stumbled on your blog and found your studio posts very helpful, as I’m in the process of building a home studio myself. I’ve also seen similar paint color to the one you’ve used mentioned on portrait forums, but I was afraid the color would be too dark. However, seeing your color in your space, really helped me to envision it in mine. So thanks! And yes, the floor mat is a great idea too! Uline has some anti-fatigue mats I’ve been looking at that aren’t too expensive.
LikeLike
Thank you for sharing this practical advice. I’m a budding artist trying to set up a home studio and have no idea where to start. You helped me immensely. I was especially interested in lighting, both for the studio and illuminating the still life. Appreciate this.
I also like the cat bed…my tabby is curled in his under my table as I write this…makes the studio so cozy.
Cheers,
Donna in Oregon
LikeLike
Thanks for yoir personal marvelous posting! I actually enjoyed
reading it, you can bbe a great author.I wiol remember to bookmark your blog and will
come back down the road. I want to encourage one to continue your great writing, have a nice evening!
LikeLike